Blog

Free Printable Some Bunny Loves You Illustration

Spring is in the air and with it comes a time of renewal, growth, and new beginnings. As we welcome the change of season, we’re excited to share a free printable illustration with you that captures the joy and whimsy of spring which also doubles as a fun Valentine or romantic themed graphic.

Featuring a cute watercolor bunny, this illustration is available in two versions – one with text that reads “Some bunny loves you” and one without text so that you can add your own. It’s designed to be printed on letter/A4 paper, but can easily be resized to create cards, posters, or other items to celebrate the season.

This adorable bunny illustration is perfect for all sorts of springtime projects. Print it out and use it to make charming greeting cards for loved ones, decorate your home with a sweet springtime touch, or create posters to brighten up your workspace or classroom. The possibilities are endless!

Of course, this is just one of many free printables that we offer. Whether you’re looking for coloring pages, templates, or other designs, we have hundreds of options to choose from. All of our printables are designed to make it easy and fun to get creative and bring some joy and color into your life.

So why not take a moment to explore our collection of free printables? You’re sure to find something that catches your eye and inspires your creativity. And in the meantime, enjoy this adorable bunny illustration – we hope it brings a smile to your face and a touch of springtime joy to your day.

👉👉👉 Looking for more spring themed printables? We have more spring freebies HERE!

Don’t forget to sign up to our newsletter! Be the first to know of new freebies and other fun things! SIGN UP HERE 🙂

Download Free Bunny Illustration:

some bunny makebreaks

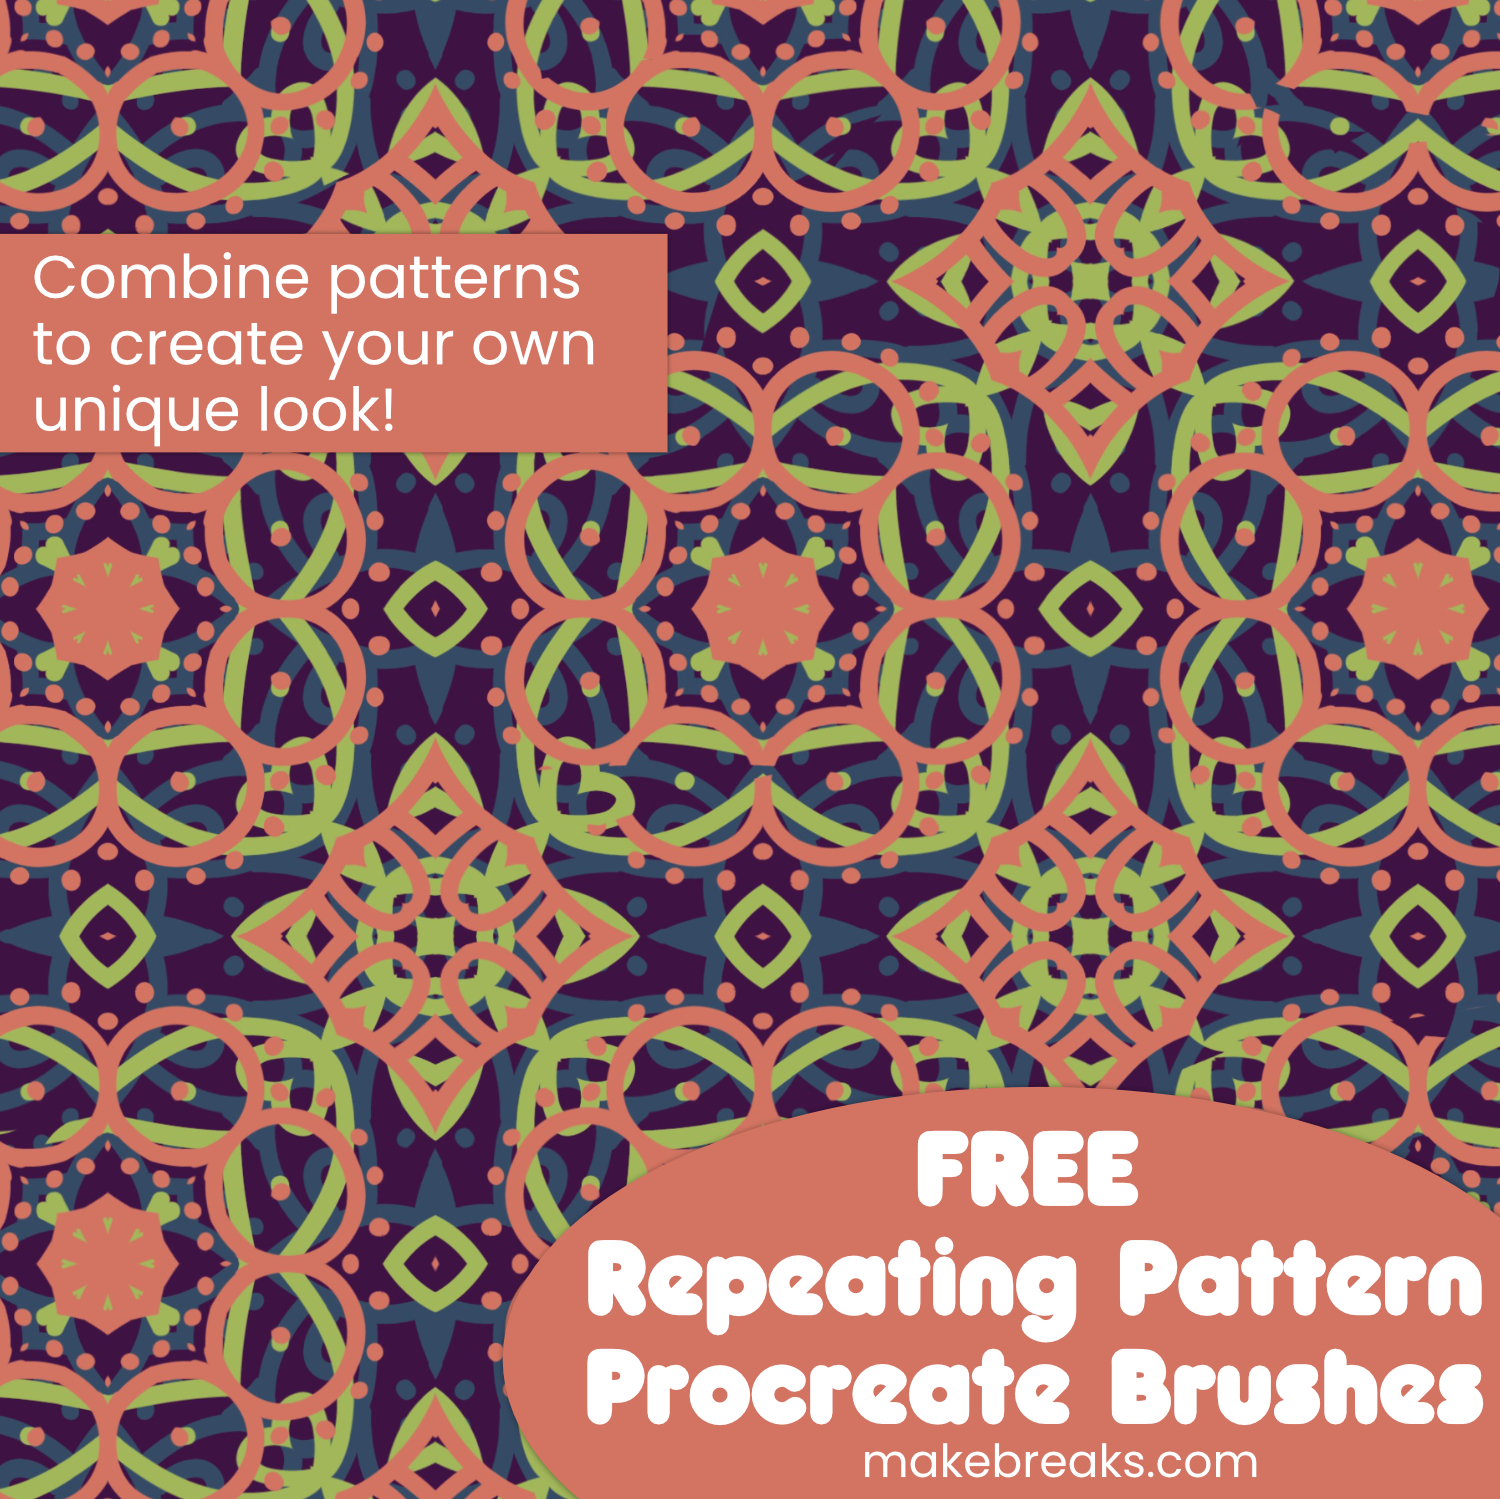
Free Procreate Repeating Pattern Brushes

Introducing our amazing range of free Procreate brushes featuring a gorgeous repeating geometric pattern! There are 4 different patterns sets for you to download below – each with 10 different patterns!

What are repeating pattern brushes? These are simply brushes which form a pattern when you move your stylus/finger across the screen in Procreate. The pattern appears as if by magic.

These geometric pattern brushes are perfect for digital artists who want to add a touch of sophistication to their designs for print or digital use. We have also designed these patterns to make great coloring pages too!

You will find the free Procreate seamless pattern brushes download below 🙂

How to Download and Install the Free Procreate Pattern Brushes

To get started, simply download the brushes onto your device. Then, open Procreate and create a new canvas. Tap the brush icon in the top right corner to open the brush panel. At the top of the panel, you’ll see a plus sign – tap this to import the new brushes.

A menu will appear, and you’ll need to locate the brushes you downloaded and select them. Once you’ve selected the brushes, they’ll appear in the brush panel alongside your other brushes.

Another way to install the brushes is to download the .brushset to your iPad and then tap on the icon and it will open directly in Procreate.

To use the repeating geometric pattern brushes, select the brush you want to use from the brush panel.

How to Adjust the Size of the Pattern

Change the size of the pattern to make it as big or small as you like. It’s super-easy to do!

The size of the pattern can be adjusted by using the slider in the Brush Studio. To open the Brush Studio and tap on the brush you want to modify-.

In the Brush Studio, you’ll see several options for customizing the brush. To adjust the size of the repeating pattern, click on ‘Grain’. Here, you can adjust the scale slider to change the size of the pattern. This is particularly important if you want to layer patterns together to make sure the grain scale is the same for each brush.

With this set of free Procreate brushes, you can create amazing digital artwork with ease. Whether you’re a seasoned professional or just starting out, these brushes will elevate your designs to the next level.

Download the free pattern brushes below!

How to Layer Patterns

This falls very much under the heading ‘experimental’ – however many of our free pattern brushes can be layered together. Just change brush and paint over the top and you will see the patterns layering. I suggest creating a new layer for each brush, therefore if you don’t like the finished result, you can just delete that layer!

Also, working on different layers will allow you to change the finished effect of each layer. Try using the hue tool to change the color or look at the blending modes in the layer panel.

Tip: The key to successful layering of patterns is to ensure they are all the same scale. To check, tap on the brush to open the Brush Studio and then look under ‘Grain’. Note, some of our brushes are a different scale, so may not layer.

Download Free Seamless Pattern Brushes for Procreate

Click on the button under each preview image to download the brush set. There are 10 free repeating pattern brushes in each set!

How to Use the Free Pattern Brushes For Procreate

There are many ways to use these free pattern brushes from creating backgrounds to decorating covers for planners. Here are some ideas!

  1. Experiment with colors: One of the great things about these brushes is that they can be used with any color. Try using light colors on a dark background to create a cool and modern effect.
  2. Use them for coloring pages: These brushes are perfect for creating coloring pages. Use the pattern to fill a shape or try creating a line drawing and use the repeating pattern brush to fill in the shapes. This can create a unique and fun coloring page.
  3. Layer the patterns: By using the same scale for the grain size, you can draw over the pattern to create layered effects. This can add depth and texture to your artwork.
  4. Create backgrounds: Use the repeating pattern brush to create beautiful backgrounds for your designs. By adjusting the scale and color, you can create unique and eye-catching backgrounds.
  5. Add texture: Use the brushes to add texture to your artwork. By adjusting the scale and color, you can create unique and interesting textures.
  6. Use as borders or frames: Try using the repeating pattern brush to create borders or frames around your artwork. This can create a finished and polished look to your designs.

Overall, the possibilities with these brushes are endless. Experiment with different colors, scales, and layering techniques to create unique and stunning artwork.

Free Unicorn Mood Tracker Page for your Bullet Journal or Planner Page

Free undated unicorn mood tracker for your bullet journal or planner page! This unicorn tracker features a series of unicorns for you to color. While I’ve called this a mood tracker, it can be used in many ways, for example as a habit tracker. The unicorns have three main elements:

  • Nose
  • Head
  • Mane

Therefore instead of coloring the whole unicorn in one color, you can use the three different parts for different things for example habits. I haven’t included an index key so you can add your own.

This will print on letter / A4 paper or you can use it in a digital journal or add to a coloring app.

Don’t forget to take a look around the rest of our site – everything we have is free to download. If you have any requests for future products, just leave a comment and we’ll add it to the list!

Be the first to know of new freebies and other fun things! SIGN UP HERE 🙂

Download Free Unicorn Mood Tracker

Unicorn Mood Tracker

Download more than 60 FREE tracker sheets

View the full selection here

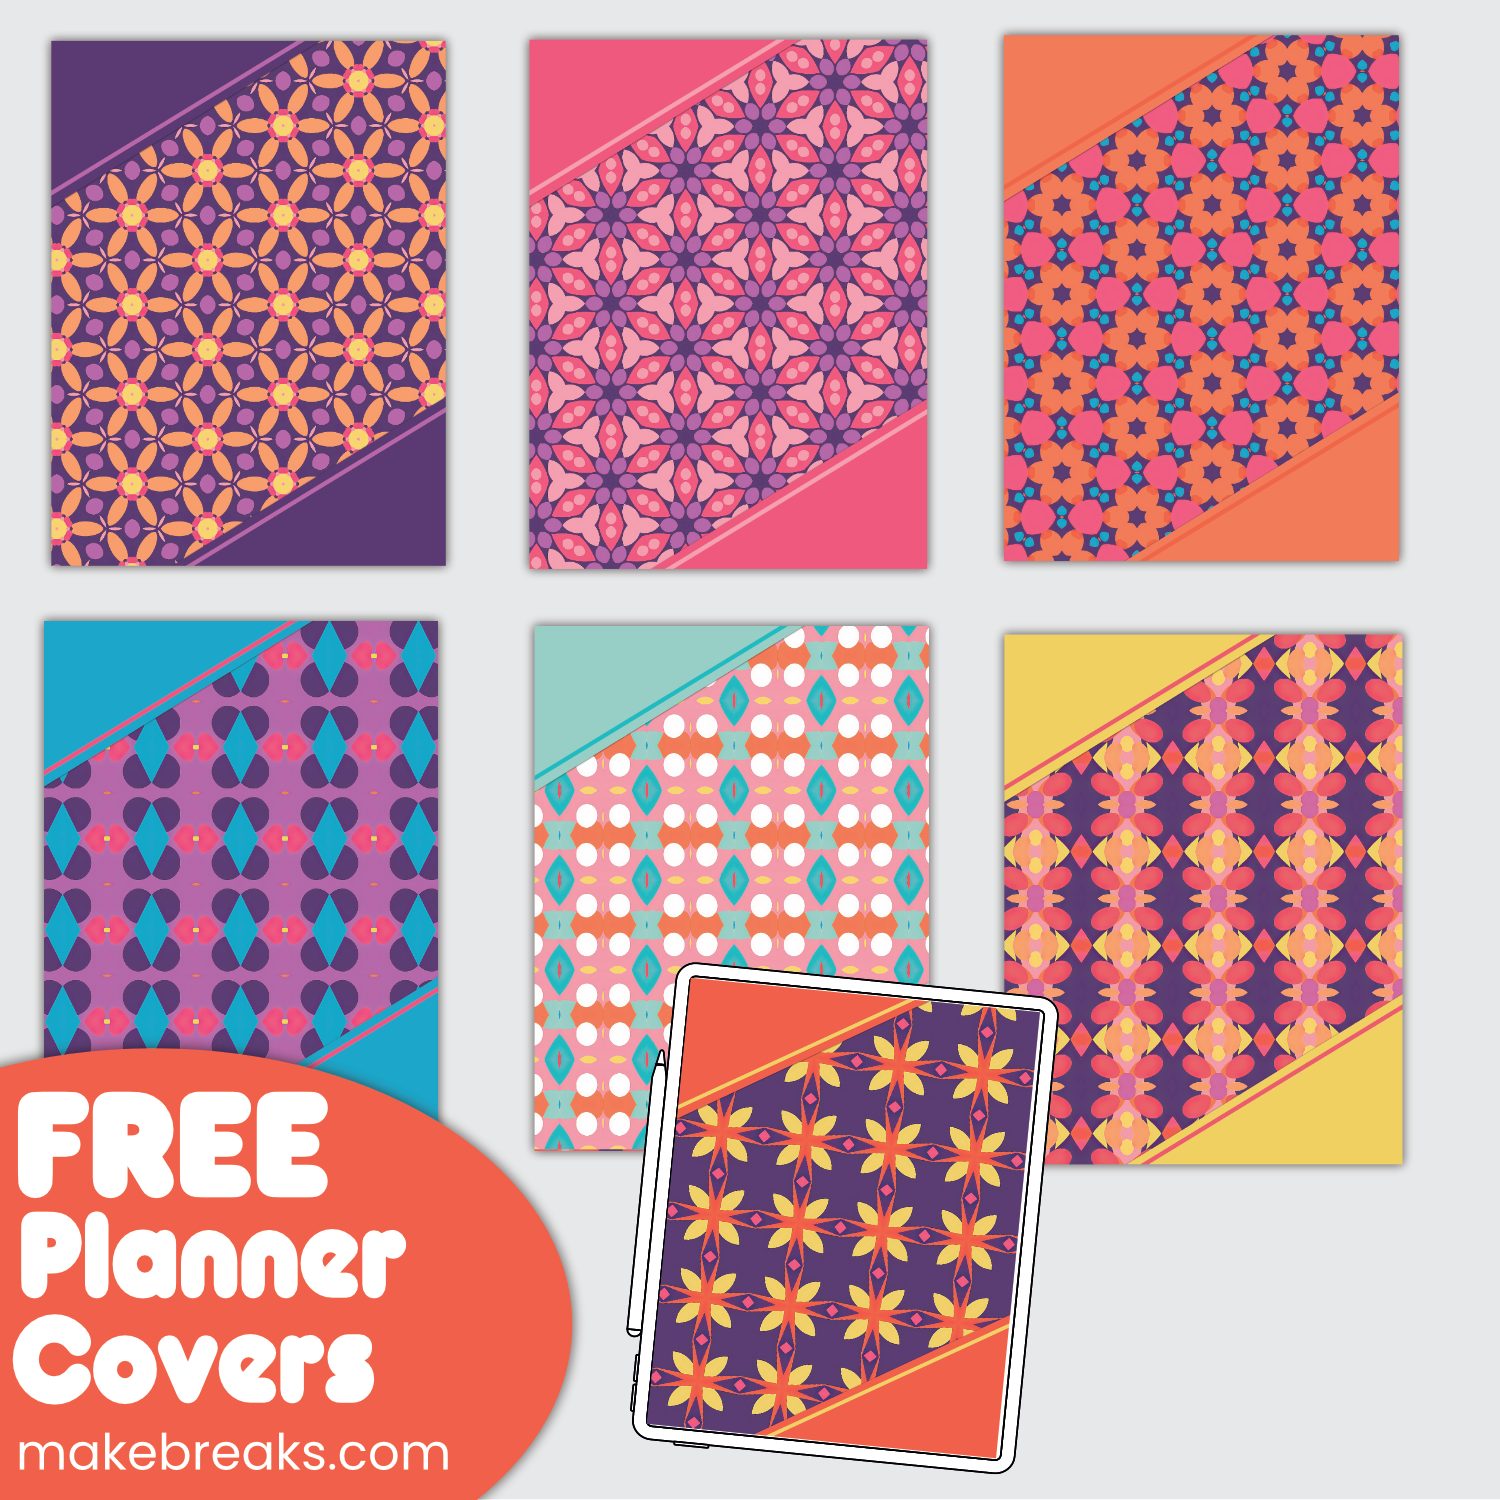
Free Colorful Digital Planner Covers Set 3

Looking to add some pizzazz to your digital planner? Our free digital planner covers are just what you need! Say goodbye to plain and boring planner covers and hello to our bold and vibrant designs that are sure to make your planner stand out.

Our covers are perfect for Goodnotes and PDF planners and can be easily downloaded below. Choose from a variety of designs. Plus, our covers feature blank boxes where you can add your own text, making them versatile for any topic, month, or year.

Installing our custom covers on Goodnotes is a breeze. Simply download the free digital planner covers, unzip the file to access the individual cover images, and then insert the image you want to use into a new notebook. Use the resizing handles to adjust the image size to fit the entire notebook cover, save your notebook, and voila! Your custom cover is installed.

Don’t settle for a plain and boring digital planner any longer. With our free digital planner covers and easy installation instructions, you can add some personality and flair to your planner in no time.

More in this series

We have more planner covers to match this set. Check them out below!

How to Install Custom Covers on Goodnotes

To install our custom covers on Goodnotes, start by downloading the free digital planner covers from Makebreaks. Unzip the file to access the individual cover images, then open Goodnotes and create a new notebook. Click on the “Insert” button and select “Image,” then choose the cover image you want to use and insert it into the notebook. Use the resizing handles to adjust the image size, making sure it fits the entire notebook cover. Click on the “Done” button and save your notebook. Repeat these steps for each cover design you want to use.

With our free colorful digital planner covers and simple installation instructions, you can quickly and easily add some personality and flair to your digital planner.

More Digital Planner Freebies HERE!

Each of these free digital planner covers has been saved as an image file for you to import to your planner Note, these files have been optimized for digital use and are not designed for printing.

Add these embellishments to your Goodnotes planner cover, digital notebook planner – or any other pdf planner.

You will find we have a range of other digital planner freebies for you to download and add to your planner. New freebies are added weekly so don’t forget to come back and see what new goodies we have for you.

Download Digital Planner Cover

Colorful Digital Planner Cover 3

Don’t forget to take a look around the rest of our site – everything we have is free to download. If you have any requests for future products, just leave a comment and we’ll add it to the list!

Be the first to know of new freebies and other fun things! SIGN UP HERE 🙂

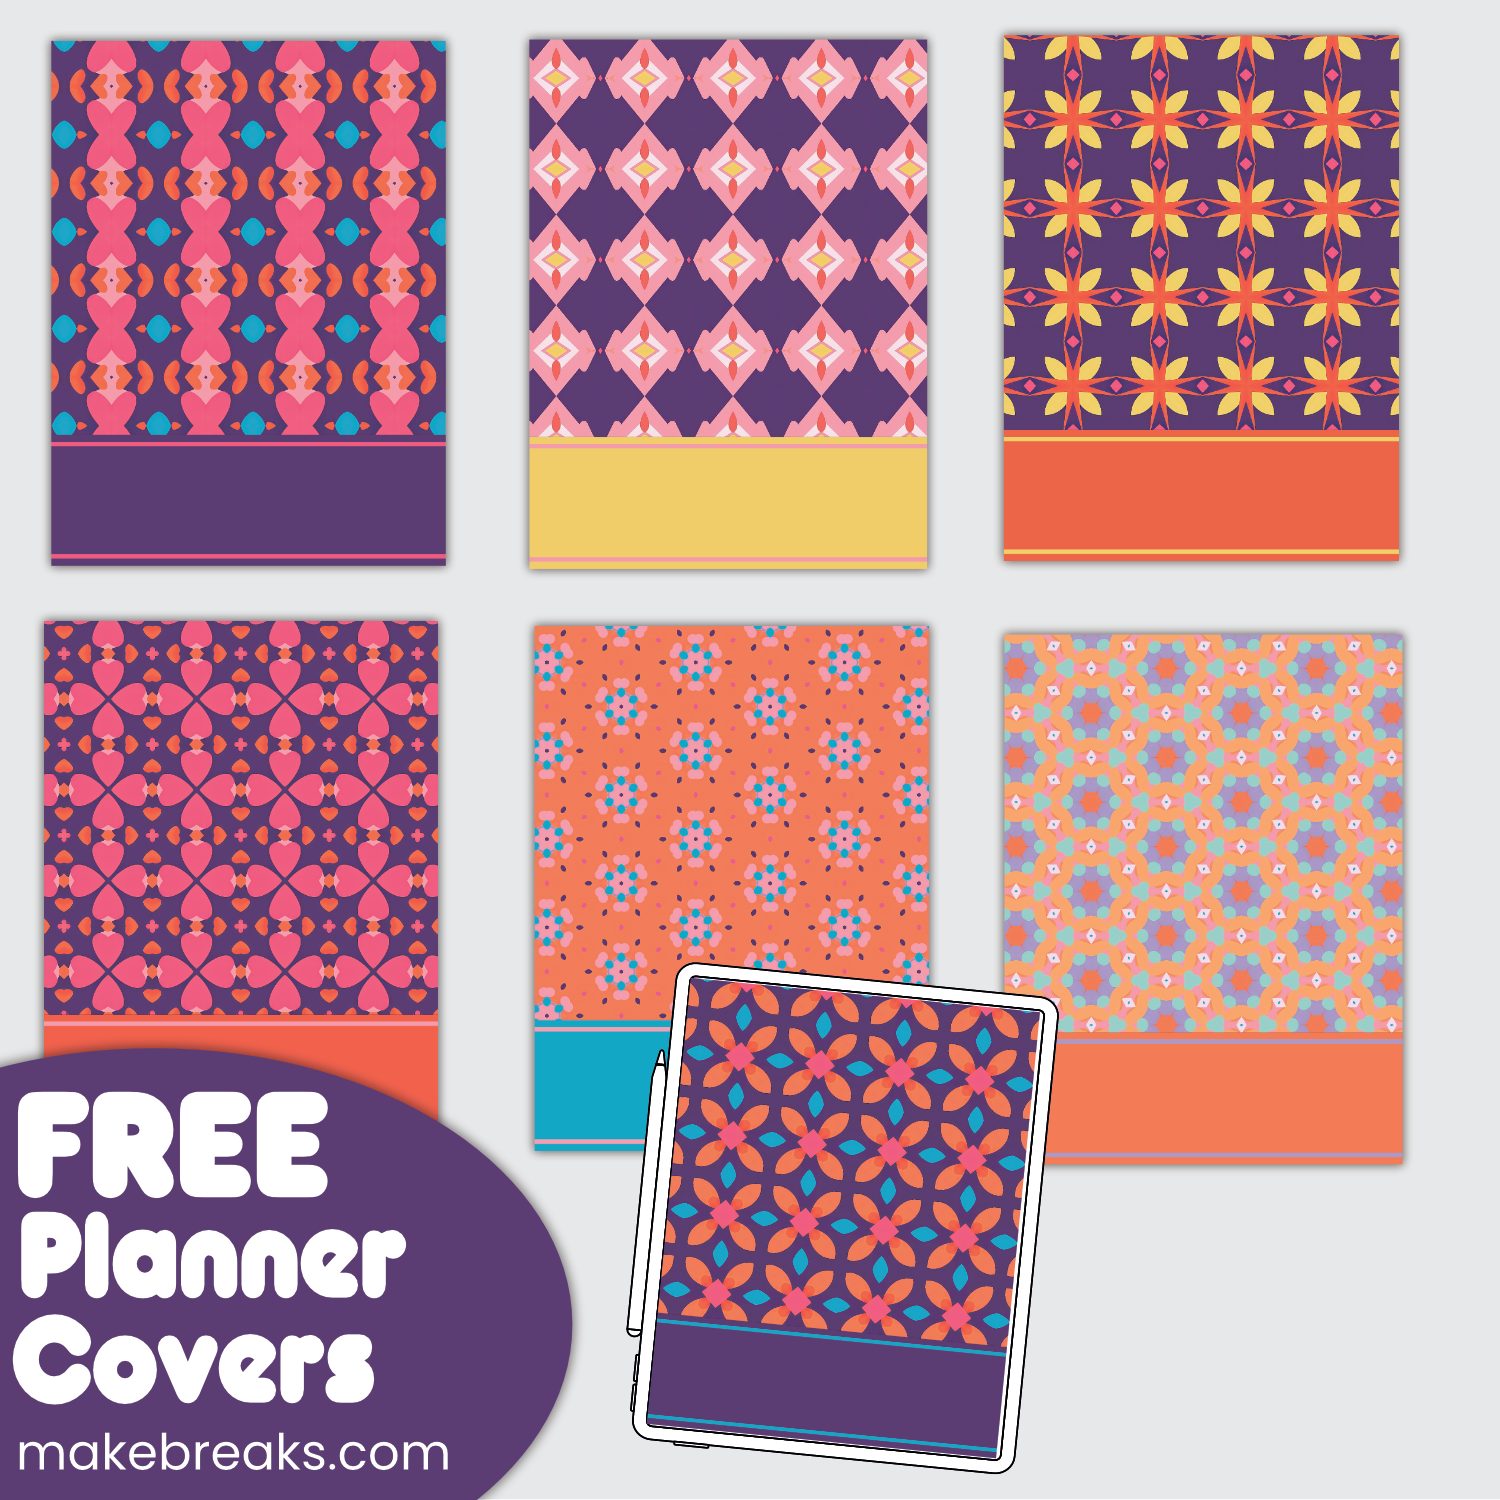
Free Colorful Digital Planner Covers Set 2

Do you want to add some personality and color to your Goodnotes or PDF planner? Look no further! We offer a collection of free digital planner covers that are both bold and vibrant, making your planner stand out. Our designs range from funky and retro to abstract and bold, with blank boxes where you can insert your own text, making them versatile for any topic, month, or year. The best part? Our covers are optimized for digital use and are easy to install.

More in this series

We have more planner covers to match this set. Check them out below!

How to Install Custom Covers on Goodnotes

To install our custom covers on Goodnotes, start by downloading the free digital planner covers from Makebreaks. Unzip the file to access the individual cover images, then open Goodnotes and create a new notebook. Click on the “Insert” button and select “Image,” then choose the cover image you want to use and insert it into the notebook. Use the resizing handles to adjust the image size, making sure it fits the entire notebook cover. Click on the “Done” button and save your notebook. Repeat these steps for each cover design you want to use.

With our free colorful digital planner covers and simple installation instructions, you can quickly and easily add some personality and flair to your digital planner.

More Digital Planner Freebies HERE!

Each of these free digital planner covers has been saved as an image file for you to import to your planner Note, these files have been optimized for digital use and are not designed for printing.

Add these embellishments to your Goodnotes planner cover, digital notebook planner – or any other pdf planner.

You will find we have a range of other digital planner freebies for you to download and add to your planner. New freebies are added weekly so don’t forget to come back and see what new goodies we have for you.

Download Digital Planner Covers

Colorful Digital Planner Cover 2

Don’t forget to take a look around the rest of our site – everything we have is free to download. If you have any requests for future products, just leave a comment and we’ll add it to the list!

Be the first to know of new freebies and other fun things! SIGN UP HERE 🙂

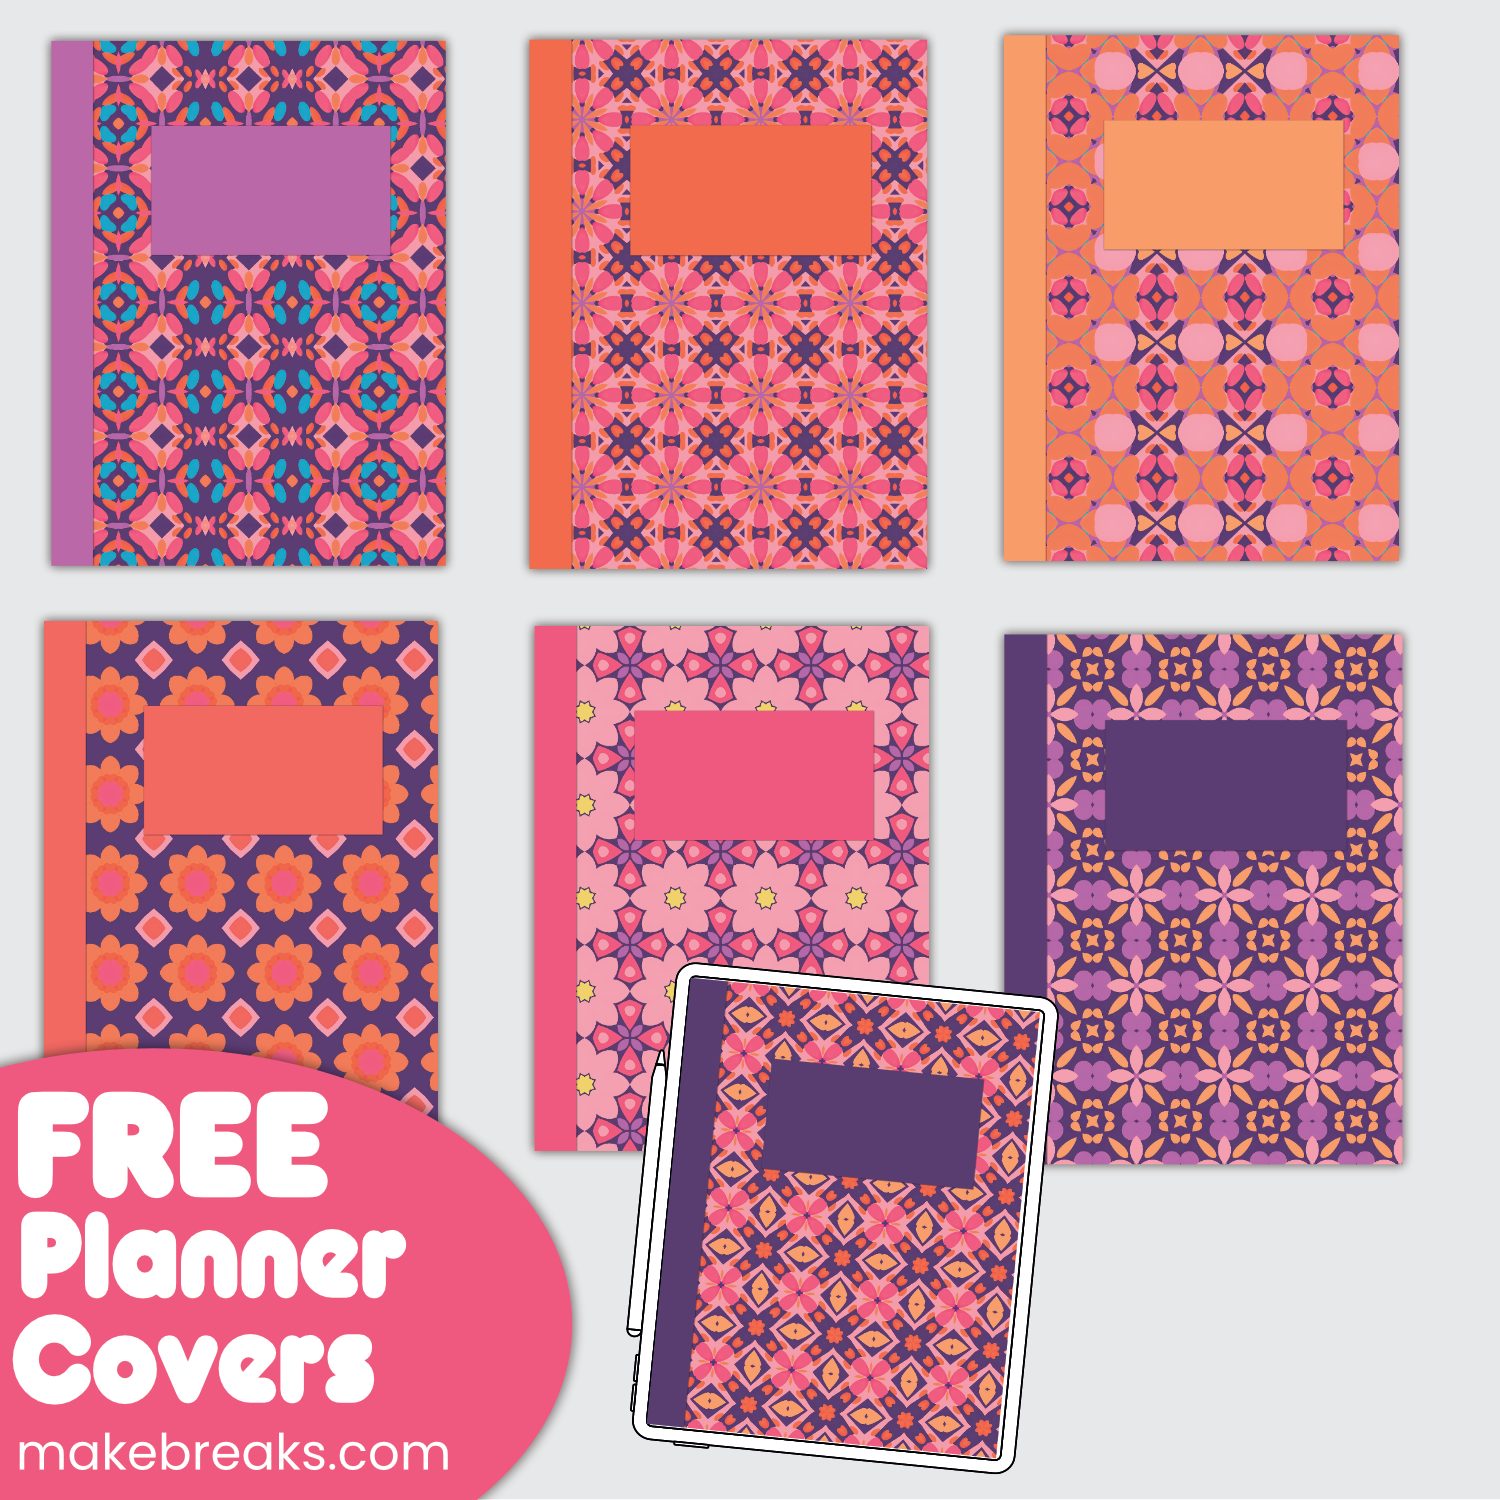
Free Colorful Digital Planner Covers Set 1

This is a set of colorful free digital planner covers for your Goodnotes and PDF planners.

Are you tired of your digital planner looking plain and boring? Do you want to add some color and personality to your planner? Look no further! We have sets of free colorful digital planner covers available for download at Makebreaks which you will find for download below.

Our digital planner covers feature bold and vibrant designs that are sure to make your planner stand out. And the best part? They are optimized for digital use, so you can easily install them on your digital planner app of choice – and they’re free!

More covers in this series:

One popular digital planner app is Goodnotes, and we’ll provide instructions on how to install our custom covers on that app. Don’t worry if you’re not familiar with the app – we’ll walk you through each step.

Colorful Covers for Digital Planners

But first, let’s take a closer look at our free planner covers.

The designs of our digital planner covers range from bold and abstract to funky and retro. One of the great things about digital planners is they are extremely versatile, therefore you need covers that also versatile, and ours have bold blank boxes where you can add your own text and they can be used for any topic, month or year. This means you can switch up your cover design whenever you want, without worrying about it being outdated.

How to Install Custom Covers on Goodnotes

Now, let’s get into how to install our custom planner covers on Goodnotes.

Step 1: Download the covers Head over to Makebreaks and download the free digital planner covers. You’ll receive a zip file containing all of the designs.

Step 2: Unzip the file Unzip the file to access the individual cover images.

Step 3: Add the covers to Goodnotes. Open Goodnotes and create a new notebook. Click on the “Insert” button, then select “Image.” Choose the cover image you want to use from your files and insert it into the notebook.

Step 4: Adjust the image size Use the resizing handles to adjust the image size so that it fits the entire notebook cover.

Step 5: Save the cover Click on the “Done” button and then save your notebook. Your custom cover is now installed!

Repeat these steps for each cover design you want to use.

And that’s it! With our free colorful digital planner covers and these simple instructions, you can add some personality and flair to your digital planner in no time. Happy planning!

More Digital Planner Freebies HERE!

Each of these free digital planner covers has been saved as an image file for you to import to your planner Note, these files have been optimized for digital use and are not designed for printing.

Add these embellishments to your Goodnotes planner cover, digital notebook planner – or any other pdf planner.

You will find we have a range of other digital planner freebies for you to download and add to your planner. New freebies are added weekly so don’t forget to come back and see what new goodies we have for you.

Download Digital Planner Cover

Colorful Digital Planner Cover1

Don’t forget to take a look around the rest of our site – everything we have is free to download. If you have any requests for future products, just leave a comment and we’ll add it to the list!

Be the first to know of new freebies and other fun things! SIGN UP HERE 🙂

FREE Embellishment Templates for Digital Planners, Cards & Digital Crafts

5 Free embellishments for your digital planners, digital scrapbooks and other digital crafting projects 🙂 Embellishments are an essential part of digital planners, digital scrapbooking, and digital crafts. They add a fun and creative touch to any project, but buying them can be expensive. Fortunately, there are free embellishment templates available that you can use to create your own unique designs. Here we have five free embellishment templates that you can use in any graphics package which uses layers. Simply fill with your own color or pattern to create unique designs for your projects.

Card made using the embellishments

PNG Files with Transparent Backgrounds

These files are ideal for using in digital graphics apps such as Procreate and Affinity Designer/Photo as well as desktop apps such as Photoshop. Plus they can be used in free graphics apps like Medibang, Ibis Paint and the fantastic Photopea which is a free application you can use in your browser (nothing to download!).

You can also use these graphics to create cute greeting cards. Check out our free greeting card templates HERE!

More Cute Sticker & Clipart Sets

If you like these graphic, you’ll find more sets stickers HERE.


I would LOVE IT if you tag me on Instagram or your favourite social media site if you use these graphics  #makebreaks #digitalcoloring 😀

If you would like me to share your finished artwork on the site or social media, you are very welcome to send me a finished copy of your project (you are welcome to watermark it). Send it to kate@makebreaks.com with any info about how you would like me to credit your work and website or social media links.

Want to know when new free stickers and clipart pages are added? Be the first to know of new freebies and other fun things! SIGN UP HERE 🙂

Download Free Embellishment Templates

Embellishments

Spread the Love!

Help us spread the word about our free graphics and other printables 🙂 Tell others on social media, share links with your friends, post finished projects and tag us etc. This helps us keep creating new FREE graphics for you to enjoy!

How To Sell Handmade Cards 2023 – Essential Reading

In this blog post we look at how to sell handmade cards in 2023. However, this isn’t a blog post to skim over, we’ve posed some very important questions for you to answer to make sure that you are on the right track. It’s easy to dream about creating a handmade card business, it’s less easy to make this a reality without some serious and focussed planning. And that’s the purpose of this post, to ensure you have the information YOU need to create a plan and start your handmade card business.

The Business of Greeting Cards

If you enjoy making cards and want to turn your hobby into a business, then it’s time to start planning! Making and selling handmade greeting cards can be a great way to earn some extra money or even build a significant income. Handmade cards are still very popular, and many people prefer to give them as gifts for birthdays and special occasions. In fact, the greeting cards market is a massive $7.5 billion industry each year!

More about making and selling handmade cards

If you’re serious about starting your own card making business, we’ve got some tips to help you get started. You’ll need to put together an initial business plan, which will help you define your goals and figure out the steps you need to take to get there. From there, you can start building your inventory, setting up your workspace, and marketing your cards to potential customers.

Remember, running a business takes hard work, dedication, and patience, but if you’re passionate about card making and willing to put in the effort, it can be a very rewarding and fulfilling venture. So, let’s get started on turning your love for card making into a thriving business!

Learn How to Start a Handmade Card Business

Starting a handmade card business can seem overwhelming, especially if you’re new to entrepreneurship. But don’t worry, there are many places to turn for help and support!

Online groups are a great place to start. There are plenty of communities of makers who are willing to share their experiences and offer advice. You can also connect with other card makers on social media platforms like Instagram and Facebook.

If you’re planning to sell your cards on Etsy, you’re in luck. The site offers many tutorials and resources to help you get started, from creating your shop to optimizing your listings. Additionally, there are many books available on running a successful handmade business. Just make sure to find up-to-date resources, as the market for selling handmade cards is constantly evolving.

Online training and workshops are another great option. You can find courses that cover everything from branding and marketing to product photography and pricing. Some popular platforms for online courses include Skillshare, CreativeLive, and Udemy.

Plan Your Handmade Card Business

Starting a handmade card business is an exciting venture, but before you start selling, it’s important to take some time to plan. A business plan can help you stay on track, meet your goals, and avoid any potential pitfalls. Here are some questions you should be asking yourself and the information you need to know in more detail:

  1. What is your vision for your business?
  • Define your long-term goals and objectives for your handmade card business.
  1. Who is your target audience?
  • Determine who your ideal customer is and what their needs and preferences are.
  1. What makes your cards unique?
  • Identify your unique selling point (USP) and what sets your cards apart from competitors.
  1. How will you sell your cards?
  • Consider the various sales channels available to you, such as online marketplaces, in-person markets, or wholesale partnerships.
  1. How will you price your cards?
  • Determine the cost of materials, labor (your time – don’t forget 🙂 , and overheads, and factor in a profit margin that’s in line with the market.
  1. How will you market your cards?
  • Develop a marketing plan that outlines how you will reach your target audience, such as through social media, email marketing, or advertising.

Your Handmade Card Business Plan

Once you have answered these questions and have a clear understanding of your business, it’s time to put together your business plan. Don’t skip this – even if you are not going to share it with anyone other than yourself – doing the research for your business plan will help to ensure you have the foundations for a successful business.

A business plan should include:

  1. Executive summary: An overview of your handmade card business, including your mission, vision, and objectives.
  2. Market analysis: An analysis of the market you will be competing in, including the industry size, trends, and competitors. A simple search of platforms like Etsy will give you a great insight into competition and the number of cards available (but don’t let that put you off, find your niche will be key to your success)
  3. Products and services: A detailed description of the handmade cards you will be selling, including your USP (as with your niche, this is key. A business selling funny handmade cards for poodle owners is more likely to find a loyal following than a business which sells general cards with no particular style).
  4. Sales and marketing: A description of your sales strategy and marketing plan.
  5. Financial projections: A detailed financial forecast that outlines your revenue, expenses, and profit margins (and remember to cost in YOUR time!).
  6. Operations: A description of how your business will be managed and run on a day-to-day basis – if it is only you making cards, what will happen when you are on vacation or need some downtime. Will you bulk create cards and hold stock?

Remember, a business plan is a living document that should be revisited and revised regularly as your business grows and evolves.

Decide Where to Sell Your Cards

Selling handmade cards can be a profitable business, but it’s important to choose the right platform to showcase your products. Here’s a breakdown of the different options available:

  1. Online handmade marketplaces
  • Online craft marketplaces such as Etsy, Amazon’s Handmade, and Artfire have become increasingly popular platforms for selling handmade cards. These sites allow you to set up your own online store without the need for technical skills. However, you will need to take high-quality photos of your cards, write compelling product descriptions, and learn about search engine optimization to get your store noticed. The Etsy seller’s handbook is a valuable resource that can guide you through the process of setting up your store and optimizing your listings.
  1. Local businesses and craft fairs
  • Another option is to sell your handmade cards through local businesses or at craft fairs. This can be a great way to get your products in front of potential customers and build relationships within your local community. Keep in mind that you will need to have a consistent supply of cards, be willing to engage with customers in person, and potentially pay a fee to participate in these events.
  1. Your own online store
  • If you have some technical skills, you can set up your own online store using platforms like Shopify or WooCommerce. These platforms provide a more customizable option than online marketplaces and give you more control over your branding and marketing. However, you will need to invest more time and effort into building and maintaining your website.

Having your own online presence is important regardless of the platform you choose. Consider taking low-cost courses or tutorials to help you get started with your first website. With the right platform and a bit of effort, you can build a successful handmade card business and share your beautiful creations with the world!

Who Is Your Target Market and Ideal Customer?

Understanding your target market is probably the most important thing you need to consider when starting your handmade card business.

Identifying your target market is an essential step in building a successful handmade card business. Your target market is the group of people who are most likely to buy your cards. Here are some tips for finding your target market:

  1. Determine the style and occasion of your cards
  • Knowing what types of cards you want to create will help you determine the demographic most likely to buy them. For example, if you specialize in creating humorous cards, your target market may be people who enjoy witty and irreverent humor.
  1. Research the competition
  • Look at what other handmade card businesses are offering and who they are targeting. This can help you identify gaps in the market and differentiate your products from others.
  1. Consider the age range of your target market
  • Cards for different age groups have different design styles, sentiments, and price points. Identify the age range of the people you are targeting to help you create cards that appeal to them.
  1. Use social media to your advantage
  • Social media platforms like Pinterest, Facebook, and Instagram can be powerful tools for reaching your target market. Join Facebook sales groups, find relevant Etsy groups, and post images of your cards on Instagram to showcase your work and reach new customers.
  1. Monitor your sales data
  • Keep track of your sales data to help you identify patterns in your customers’ demographics, interests, and preferences. This will help you tailor your products and marketing efforts to better reach your target market.

Remember, understanding your target market is key to defining your prices, creating effective marketing campaigns, and ultimately, growing your business. If you don’t know who your ideal customer is, you won’t know where to find them or what cards to create that they will love.

Your Handmade Card Niche

To succeed in the competitive world of handmade card businesses, it’s important to find a way to set yourself apart from the crowd. Having a niche and being known as ‘the’ card maker in that niche will help you build a loyal following. Here are some tips for identifying a niche that can help you stand out:

  1. Look for gaps in the market: Consider what types of cards are already available and think about how you can differentiate your products. Can you offer something that no one else is offering?
  2. Focus on a niche: Many successful handmade card sellers focus on a tightly defined niche. This can help you to stand out in a crowded market and create a unique selling proposition.
  3. Draw on your passions: When thinking about a niche, consider the things that inspire you or make you happy. This could be anything from a love of animals to a passion for the environment.
  4. Think about what makes you unique: Consider your own personal style and how you can incorporate this into your card designs. This can help you to create a signature look that sets your products apart.

Find 30 niche ideas for handmade cards businesses.

Remember, to be successful in the handmade card business, you need to offer something different from what is already available. By identifying a niche and focusing on what makes your products unique, you can create a compelling brand that appeals to customers and sets your business apart.

Your Handmade Card Brand

When starting a handmade card business, it’s important to think carefully about the product itself. Here’s what you need to consider:

  1. Branding: Develop a strong brand identity for your business, including a name, logo, and color scheme. Your brand should reflect the unique selling point of your cards and help differentiate them from competitors.
  2. Product development plan: Put together a plan that outlines the different types of cards you will create and how you will expand your product line over time. This will help you take the guesswork out of making products that sell and allow you to plan ahead for seasonal cards.
  3. Packaging: The presentation of your cards is crucial to the success of your business. Cards that are neatly packaged in cellophane envelopes or gift boxes look more professional and can command a higher price. Consider adding a label with your contact information to encourage repeat business.
  4. Production calendar: Greeting cards are seasonal, so it’s important to plan ahead for holidays and special occasions. Start creating seasonal cards in advance to give yourself time for marketing and to ensure you have enough inventory to meet demand.

Developing a strong product and packaging strategy is crucial to the success of your handmade card business. A product development plan will help you expand your product line, while thoughtful packaging can make your cards more attractive to customers. Remember to factor in shipping and packaging costs when pricing your cards, and to stay on top of seasonal trends to ensure your business stays relevant.

Check Graphics and Illustrations Terms of Use

When creating handmade cards, it’s important to ensure that you have the legal right to use any graphics or designs that you incorporate into your products. Some artists and graphics stores may have specific terms and conditions regarding the use of their artwork, such as limitations on commercial use or restrictions on the sale of products made with their designs.

Rubber stamps can also be subject to restrictions on their use, so it’s important to check the terms and conditions carefully before making any purchases. It’s essential to ensure that you have the proper rights to use any graphics or designs you incorporate into your handmade cards to avoid potential legal issues down the line.

When selecting graphics or designs for your handmade cards, be sure to read the terms and conditions of the artist or graphics store carefully before making a purchase. This will help you to avoid any potential issues and ensure that you have the proper rights to use the artwork in your products.

If you’re looking for graphics that you can use for commercial purposes, be sure to check out all our graphics here at Makebreaks.com, where ALL graphics can be used to make and sell handmade cards. By using graphics that you have the proper rights to, you can create beautiful and unique handmade cards that are both legal and ethically sound.

How to Price Your Handmade Cards

Pricing your handmade cards is tricky. It gets extra complicated if you plan to sell wholesale or through third parties. There are many formulas you can use, however the most important thing to remember when calculating your pricing is to include your own time. To learn how to price your handmade cards see HERE – How To Price Your Handmade Cards


In conclusion, starting a handmade card business can be a fulfilling and profitable venture, but it requires careful planning and dedication. By taking the time to develop a business plan, identifying your target market, finding a niche, and creating a strong product and packaging strategy, you can set your business up for success. Remember to consider the time commitment involved in running a small business, and to allow for the various tasks required to keep your business running smoothly. With the right strategies in place, you can build a thriving handmade card business that brings joy to your customers and fulfillment to your life.

How to Price Handmade Cards 2023

One of the biggest challenges faced by artisans starting an arts and crafts business, such as selling handmade cards, is determining the right price point. The price of a card needs to reflect the materials and labor involved while also ensuring that the card is affordable for customers.

Pricing cards too low can undervalue the work of the card maker and result in lost profits, making it difficult to sustain a business. On the other hand, pricing cards too high can lead to fewer sales, wasted time, and lost opportunities.

More Reading About Starting a Handmade Card Business

To determine the right price for your cards, there are three key factors to consider when determining your prices. By taking these factors into account and calculating your prices carefully, you can ensure that your cards are priced fairly and competitively while still allowing you to make a profit and sustain your business.

Factors to Take Into Account When Pricing Handmade Cards

When pricing handmade cards, there are several key elements to consider. These include:

  1. Materials: This refers to the cost of all the materials used to make the card, such as cardstock, embellishments, envelopes, and any other supplies needed.
  2. Labor: The cost of labor includes the time it takes to design, cut, assemble, package, and market the card. It’s important to factor in the value of your time and set a price that allows you to make a reasonable profit.
  3. Overheads: Overheads are the indirect costs associated with running a business, such as rent, utilities, internet fees, phone bills, and other administrative expenses.
  4. Graphics and illustrations: If you use graphics or illustrations in your card designs, you may need to purchase them from artists or graphics stores, which will add to your costs.
  5. Software: If you use design software or other programs to manage your business, you may need to pay for a software license, which will also add to your expenses.
  6. Trade prices and commissions: If you sell your cards through third-party platforms or stores, they may expect a trade price or take a commission on sales, which will impact your profits – plus payment processing fees charged by payment platforms such as PayPal and Stripe.

It’s important to note that there may be other costs specific to your business that should also be factored in when determining the price of your cards. By carefully calculating all of these costs and setting a fair and competitive price, you can ensure that your handmade cards are profitable and sustainable.

Don’t Forget The Profit!

It’s not a hobby! It’s important to factor in a profit when pricing handmade cards because a profitable business is essential to its sustainability. Without a profit, a business cannot grow or invest in new products or marketing. In addition, pricing cards too low may lead to undervaluing your time and materials, and ultimately may make it difficult to keep your business running in the long term. By setting a fair price that covers the cost of materials, labor, overheads, and allows for a reasonable profit, you can ensure that your business remains sustainable and profitable, while also providing high-quality handmade cards to your customers.

Handmade Card Price Formula

As we have seen, getting the price right can be a challenge. However if you truly understand your costs – and your market, it should help you with the pricing. Here’s a simple formula for pricing handmade cards – however remember to ‘sense check’ this balanced with your own knowledge and experience:

Materials cost + Labor cost + Overheads + Graphics and illustrations + Software + Trade prices/commissions = Total cost

Total cost x Markup (e.g. 2 or 3) = Wholesale price

Wholesale price x Markup (e.g. 2 or 3) = Retail price

In this formula, the total cost includes all of the expenses associated with making and selling your cards, such as materials, labor, overheads, graphics and illustrations, software, and any trade prices or commissions. The markup is the amount by which you increase the price to cover your profit margin.

Once you have calculated the wholesale price, which is the price at which you sell your cards to stores or other third-party platforms, you can then determine the retail price by applying another markup. This is the final price that you will charge to customers who purchase your cards directly from you.

Remember, this is just a simple formula, and you may need to adjust it to reflect the specific costs and circumstances of your business. By carefully calculating your costs and setting a fair price that allows for a reasonable profit, you can ensure the sustainability and success of your handmade card business.

Be Like Goldilocks 🙂

Getting the price right is key to the success of any handmade card business. Just like in the story of Goldilocks and the Three Bears, the price of your cards should be “just right.” If the price is too high, customers may not see the value and choose a more affordable option. On the other hand, if the price is too low, it may be difficult to sustain your business, and you may not make a profit.

Finding the right price for your handmade cards involves taking into account all the costs associated with making and selling them, including materials, labor, overheads, and any trade prices or commissions. By factoring in a profit margin, you can ensure that your business is sustainable and that you are compensated fairly for your time and effort.

In conclusion, pricing your handmade cards correctly is crucial to the success of your business. By finding the right price point, you can appeal to customers while also ensuring that your business remains profitable and sustainable. So, just like Goldilocks, take the time to find the price that’s “just right” for your handmade cards, and you’ll be well on your way to building a successful business.

30 Handmade Card Business Niche Ideas 2023

Welcome to the world of handmade cards! If you’re looking to start your own card-making business, or simply want to expand your creative range, then you’re in the right place. One of the most important aspects of starting any new venture is finding your niche. This can be challenging, but it is essential in a crowded marketplace. The more specific and defined your niche, the easier it will be to stand out from the competition. As the saying goes, it’s better to be a big fish in a small pond. In this article, we’ll explore 30 different niches for handmade cards, each with its own unique design ideas and target audience. So, grab a cup of tea and get ready to be inspired!

More Reading About Starting a Handmade Card Business

Handmade Card Niches

Here are 30 niches for handmade cards, along with some design ideas and suggested card types:

  1. Wedding cards: Design elegant, personalized cards for wedding invitations, thank you cards, or congratulations cards.
  2. Baby shower cards: Create cute and whimsical cards for baby shower invitations or congratulations cards.
  3. Religious cards: Design cards for religious holidays, such as Christmas or Easter, or for specific religious events, such as baptisms or confirmations.
  4. Travel cards: Create cards with travel-inspired designs, such as maps or postcards, for bon voyage or welcome home messages.
  5. Nature cards: Make cards with beautiful nature-inspired designs, such as floral or botanical patterns.
  6. Animal cards: Create cards featuring animals, such as cats, dogs, or birds, for pet lovers or animal enthusiasts – try ‘animal facts’ for a unique twist on the theme.
  7. Food cards: Design cards with food-themed illustrations or patterns, such as cakes or cupcakes, for foodies or bakers.
  8. Sports cards: Make cards with sports-related designs, such as footballs or basketballs, for sports enthusiasts. This can be developed in a whole scoreboard of different ways to create a unique niche to really make your mark and connect with your ideal customer.
  9. Music cards: Create cards with musical motifs, such as notes or instruments, or even short unique songs written for music lovers or musicians.
  10. Artistic cards: Design cards with abstract or artistic designs, such as watercolor or mixed media, for art enthusiasts or creatives. These can also double up as gifts for people, particularly if they include unique original art – so remember to price accordingly!
  11. Vintage cards: Make cards with vintage-inspired designs, such as retro typography or old-fashioned illustrations.
  12. Humorous cards: Create cards with funny or witty sayings for those who love to laugh.
  13. Inspirational cards: Design cards with inspirational quotes or messages for those who need encouragement or motivation.
  14. Eco-friendly cards: Make cards using sustainable materials, such as recycled paper or plant-based inks, for eco-conscious customers.
  15. LGBTQ+ cards: Create cards with designs that celebrate and support the LGBTQ+ community, such as rainbow patterns or love-themed illustrations.
  16. Mental health cards: Design cards with uplifting messages or motivational quotes for those who may be struggling with mental health.
  17. Personalized cards: Create customized cards with names, monograms, or photos for special occasions, such as birthdays or anniversaries. These will take you more time, so take this into account when pricing personalized cards.
  18. Braille Cards: A niche for the visually impaired, these cards are designed with raised dots to spell out messages in braille.
  19. Seeds cards: These cards come with embedded flower or vegetable seeds that can be planted, giving the recipient a lasting gift.
  20. Edible cards: Cards made from edible materials like rice paper, sugar, or chocolate are a unique twist on the traditional greeting card.
  21. Pet cards: These cards are specifically designed for pet owners and feature personalized messages from the pet’s perspective (this is one way that will make your cards stand out!)
  22. Audio cards: Use recordable card blanks to create cards that contain a unique message – if you are musical, consider making custom jingles or singing messages. There is additional work and expertise required to make these, so factor it into your pricing, but it’s certainly an interesting niche to explore.
  23. Joke Cards: These cards have a joke incorporated into the design, adding an extra element of fun. Consider niching down further, NSFW jokes or humour, sarcastic humour or even ‘knock knock’ jokes will make great funny cards.
  24. Spiritual cards: These can be focussed on specific religions or they can also include general spiritual themes with inspirational quotes or images..
  25. Personalized cards: These cards are tailored to the individual recipient and can feature names, photos, and other customized elements.
  26. Pop-Up cards: These cards feature a three-dimensional design that pops up when the card is opened, adding an element of surprise.
  27. Hobby cards: These cards dedicated to a certain hobby, ie cards for knitters, or cards for wood whittlers.
  28. Literary cards: Make cards with book-inspired designs, such as quotes or illustrations from classic literature.
  29. DIY cards: Design cards that come with small DIY projects or activities, such as coloring pages or origami instructions.
  30. Pet sympathy cards: Create cards with comforting messages for those who have lost a pet, featuring pet-themed illustrations or designs.

Finding a niche for your handmade card business is crucial to its success. It’s important to take the time to research and find the niche that is right for you and your cards. By doing so, you can ensure that your handmade card business not only stands out but also thrives in the long term. So, take the time to explore your options and find the niche that best suits your interests and skills – and one where you can really stand out and become ‘the’ go-to brand for cards in this particular niche.