
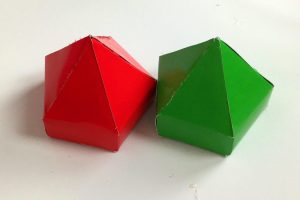
Make your own DIY paper wreath using our free template! This striking paper wreath is created from a series of polygon models which are adhered together to form a wreath shape. We created the wreath using two colors, red and green for festive celebrations. However, create the wreath in different colors for different occasions or to match your home decor.
You will see in the image below how the polygon five sided shapes are adhered together to form the wreath shapes.
This wreath is simple to make, although allow some time for the cutting and folding of the shapes.

How to Make a DIY Paper Wreath
You will need:
- Template (find the templates HERE)
- Cardstock or heavyweight paper
- Scissors or craft knife
- Adhesive (I like glue sticks, however normal white glue or wood glue will work well too)
- Metal ruler or straight edge
- Bone folder (you will use this for scoring the paper or cardstock and this will help to give you crisp edges to your folds)
Instructions
Tip: Try creating one of the pentagon shapes from scrap paper first to familiarize yourself with the technique:
1/ Download and print the template. You will require 10 of the finished pentagon shapes.
2/ Cut out the shapes, using a craft knife or scissors. You will see numbers on the edges of the template which indicate which flaps are joined, however, this is pretty self-explanatory.

3/ Score along the dotted fold lines using the bone folder and metal ruler. If you are not familiar with scoring, we do this to prepare the paper or cardstock for folding. This means using a bone folder (or blunt knife) and carefully drawing this down the side of the ruler along the fold line. This breaks the fibers in the paper and will make it much easier to fold a straight line.
Score along all the fold lines:

4/ Start adhering the edges together to form the pentagon shape:

6/ When you have finished the pentagon shapes, place the shapes into a wreath shape and start adhering them together. Each edge is the same size and shape, therefore it does not matter which edges you join on each pentagon, so if one side isn’t quite perfect, rotate the pentagon shape and use this on the glued side to hide it!
When you are finished your wreath should look like this:

Tips for finishing your DIY paper wreath
- You may want to make a hole in the back of one of the pentagon shapes to hang the wreath from a wall hook, alternatively, try making a loop of ribbon and attaching this between two of the pentagon shapes before adhering them together.
- Instead of using our red and green templates, try using odds and ends of scrapbook paper or decorative paper to get an eclectic look.
- If you want to make a bigger or smaller wreath, simply adjust the size on your printer settings.
We hope you enjoy this papercraft project from Make Breaks 🙂


