Blog

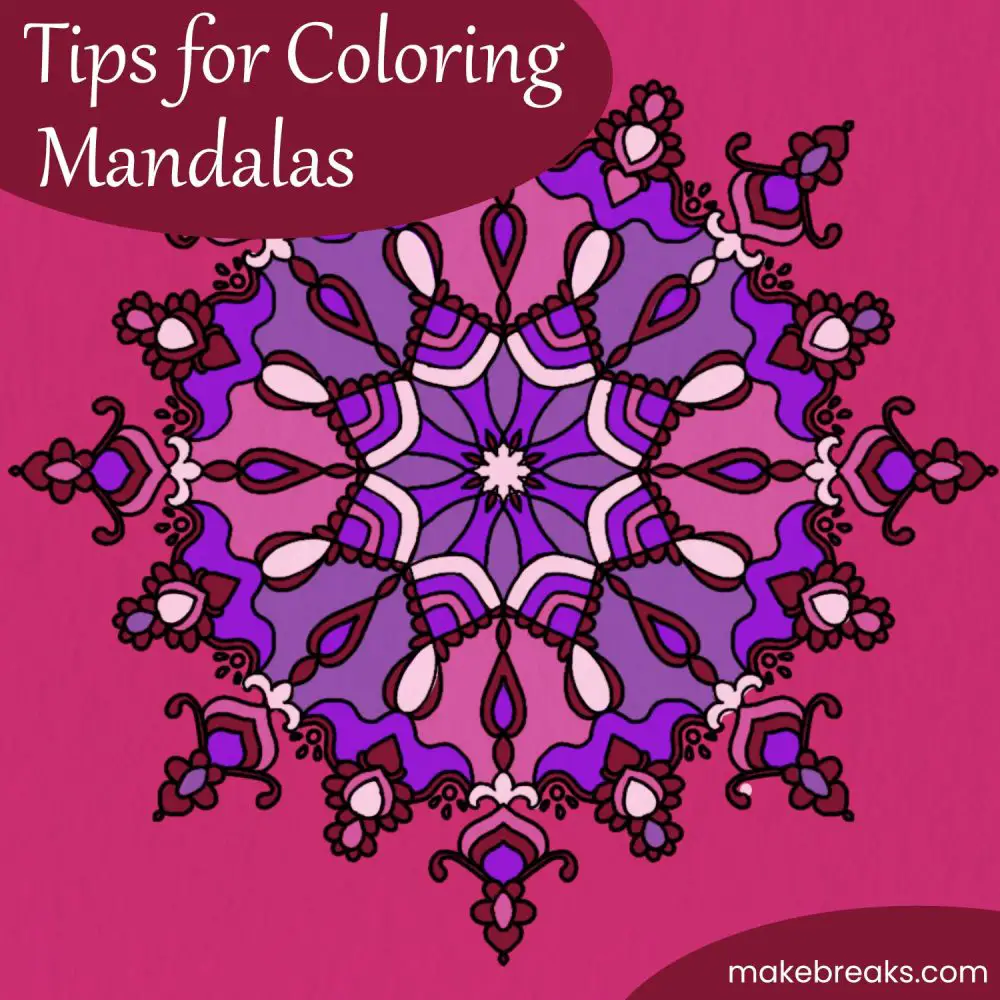
Tips for Coloring Mandalas

If you love coloring mandalas have been checking out our FREE MANDALA MAKER and our growing collection of FREE coloring pages but need a few tips on how to color mandalas, don’t worry – we have you covered!

In this post we’re going to share our lists of tips on how to color our (and other) free printable mandalas and make your own unique works of art!

Why Color Mandalas

Before we start, why do we love coloring mandalas?

Mandalas are often used for coloring because their symmetrical patterns can be very relaxing and meditative. The repetitive nature of coloring the same shapes over and over can help to quiet the mind and focus the thoughts. The act of coloring can also be a form of self-expression and can help to reduce stress and anxiety. Additionally, coloring mandalas can be a fun and creative way to explore different color combinations and color schemes.

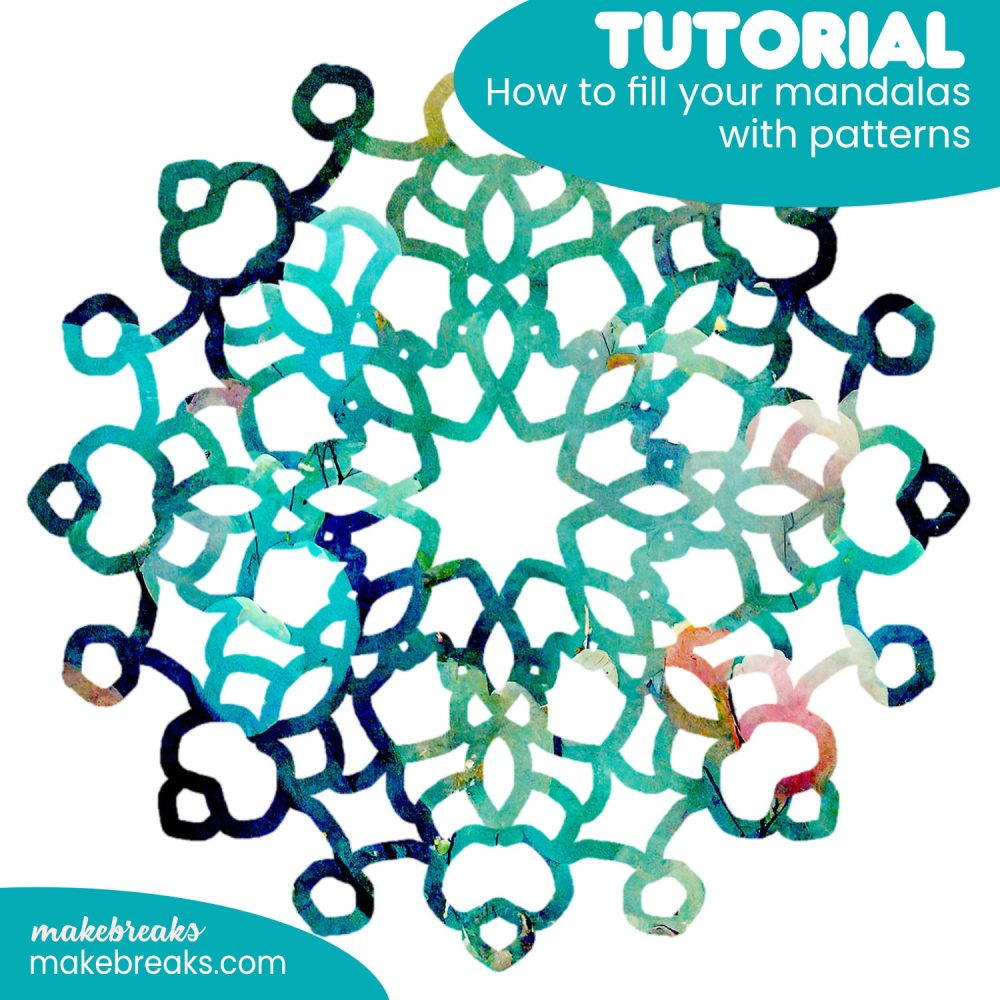
Or… if you want to try something different, learn how we created this effect below following THIS tutorial 🙂

How to Color Mandalas

Here are a few tips for coloring mandalas:

  1. Start with a light pencil sketch before adding color. This will help you to plan your color scheme and make sure that you are coloring within the lines.
  2. Use a variety of coloring tools, such as markers, colored pencils, or paint. Experiment with different textures and techniques to create interesting effects.
  3. Use a limited color palette to create a cohesive and harmonious look.
  4. Take your time and enjoy the process. Coloring mandalas is a meditative and relaxing activity, so don’t worry about finishing quickly.
  5. Use the symmetry of the mandala to your advantage. If you find yourself at a loss for what color to use next, look for the corresponding spot on the other side of the mandala and use the same color there.
  6. Be open to unexpected color choices. Sometimes using a color you wouldn’t expect can make a mandala even more interesting.
  7. Most importantly, have fun and let your creativity flow – remember, when using free mandala coloring pages you can simply reprint the coloring page and do it again if you are not delighted with the results

What To Do With the Finished Mandala?

When you have finished your mandala and are pleased with the results – what do you do with the finished artwork?

Well, here are a few ideas for what you can do with your finished colored mandala:

  1. Display it as art: You can frame your mandala and hang it on a wall or display it on a bookshelf or mantel.
  2. Use it as a meditation focus: You can use your finished mandala as a focal point during meditation or yoga practice.
  3. Give it as a gift: Your mandala makes a thoughtful and personal gift for friends and family.
  4. Scan or photograph it and use it as a digital background on your computer or phone.
  5. Use it as a pattern on a piece of clothing or a piece of home decor like a pillow or a tapestry
  6. Make a card or a scrapbook with your mandala
  7. Use it as a logo or a design element in a craft project like a DIY journal or planner.
  8. Use it as a reference for your next mandala coloring or drawing.
  9. Share it on social media and inspire others to create their own mandalas.

Remember that your mandala is a unique and personal creation, and there are countless ways to enjoy and share it.

Tips for Coloring Your Mandala Digitally

Here are some tips for coloring mandalas using apps like Procreate, Affinity Photo, or Affinity Designer:

  1. Start with a solid base color: Choose a color for the background and fill the entire layer with it. This will serve as the foundation for the rest of your coloring.
  2. Create separate layers for each section: To keep your coloring organized, create separate layers for each section of the mandala. This allows you to color each section independently and make adjustments without affecting other parts of the design.
  3. Use the blending modes: Experiment with the different blending modes to create different effects and add depth to your coloring. For example, you can use the “Multiply” blending mode to darken certain sections and create shadow.
  4. Use the gradient tool: The gradient tool is a great way to add a gradient effect to your coloring. You can use it to create a smooth transition between two colors or to blend multiple colors together.
  5. Work in small sections: Coloring mandalas can be time-consuming, so break the process down into smaller sections. Focus on one section at a time, and be patient as you build up the coloring.
  6. Don’t be afraid to try new things: Try out different techniques and styles until you find what works best for you. Don’t be afraid to make mistakes and adjust as needed. The beauty of digital coloring is that you can always undo and start over.
I created this mandala effect following the tips above and experimenting with blending modes

Best ‘Traditional Coloring’ Medium for Coloring Mandalas

If you prefer coloring mandalas using the tried and tested traditional coloring media, we have some tips to share with you! The best coloring tools for mandalas can depend on personal preference and the desired outcome. Here are a few popular options:

  1. Colored Pencils: They are great for fine details and layering colors. They are also easy to control and come in a wide variety of colors.
  2. Markers: They can be great for coloring large areas quickly and offer vibrant and intense colors. They also come in different tip widths, which can be useful for coloring different mandala shapes.
  3. Watercolors: They are great for creating a softer and more organic look. They are also easy to blend and can be used to create gradient effects.
  4. Gel pens: They are great for adding a metallic or glittery touch to your mandala. They also come in a wide variety of colors.
  5. Acrylic paint: They can be great for a bold and striking look, and they can be used on a variety of surfaces, including paper, canvas, and fabric.
  6. Combining different tools can also be fun and inspiring, for example, use colored pencils for details and markers for larger areas.

Ultimately, the best tools for coloring mandalas will be the ones that you feel comfortable using and that allow you to achieve the look and feel that you want.

Best Paper for Coloring Mandalas

When printing mandala coloring pages, it’s important to use paper that will allow your coloring tools to perform well and will also help to prevent smudging or bleeding. You will find there are plenty of options other than standard printer paper – however it will depend on what thickness paper your printer can handle – you may also need to trim the paper to size before proceeding:

  1. Heavyweight drawing paper: This type of paper is thick and sturdy, making it ideal for coloring with markers and colored pencils. It’s also acid-free, which helps to prevent the paper from yellowing over time. However, it’s difficult to print on this paper so you may need to transfer the design manually (see below).
  2. Mixed media paper: This type of paper is designed to be used with a variety of mediums, including watercolors, markers, and colored pencils. It’s often heavier than regular drawing paper and has a slight texture that can add depth to your coloring.
  3. Watercolor paper: This type of paper is specifically designed for use with watercolors. It’s thicker and more absorbent than other types of paper, which helps to prevent warping and allows colors to blend smoothly. While you can purchase printable watercolor paper, you can also transfer the design.
  4. Printer paper: This type of paper is specifically designed for printing, it’s often is a standard weight paper, it’s good for printing mandalas for coloring, but it’s not recommended for coloring with markers or watercolors as the colors may bleed or smudge.
  5. Keep in mind that some coloring tools may require a certain type of paper. For example, watercolors require a more absorbent paper to prevent warping and bleeding.

It’s always a good idea to test your coloring tools on a small area of the paper before starting your mandala.

Tips for Coloring Mandalas on Printer Paper

Printer paper is widely available and low cost, so if you are printing the mandalas for coloring on printer paper, here are some tips to help you get started.

  1. Use light pressure when coloring. Pressing too hard can cause the paper to tear or become distorted.
  2. Use colored pencils or fine-tip markers instead of heavy markers or paint. These tools are less likely to bleed or smudge on regular printer paper.
  3. Use a primer or fixative spray on the paper before coloring. This can help to prevent smudging and bleeding and can also add some texture to the paper.
  4. Be mindful of the colors you use. Some colors, such as red and blue, are more likely to bleed on regular printer paper.
  5. Use a thicker paper: If you can find a printer paper that is a little thicker than standard paper, it will help to prevent smudging and bleeding.
  6. Use a blotting paper or a piece of cloth to remove excess ink or water from your coloring tools before coloring.
  7. Be careful when coloring around the edges of the paper. The paper is more likely to tear or become distorted in these areas.
  8. Print your mandala on thicker or glossy paper : Some printer paper can be glossy and thicker than the standard paper, and that can help to prevent smudging and bleeding – but check first that this type of paper is suitable with your preferred coloring tools.
  9. Remember that coloring mandalas on regular printer paper can be a bit more challenging, but it’s still a fun and relaxing activity. Take your time and enjoy the process.

Tips for Printing Mandalas at Home

Here are a few tips for printing mandalas on a home printer:

  1. Make sure that the mandala image you are using has a high resolution. This will ensure that the final print has crisp and clear lines.
  2. Use the correct paper settings on your printer. Most printers have settings for different types of paper, such as glossy or matte. Make sure to choose the correct setting for the paper you are using.
  3. Use the appropriate print quality setting on your printer. Higher print quality settings will produce sharper and more detailed prints, but they can also take longer to print.
  4. Use a printer that is capable of printing with high quality. Some printers are better suited for printing detailed and complex images like mandalas than others, so check the specs of the printer you have.
  5. Check the ink level of your printer before printing. Running out of ink in the middle of a print can cause the final print to be of poor quality.
  6. Test your printer settings and paper on a small sample before printing your mandala. This will help you to get a sense of how the final print will look and make any necessary adjustments.
  7. Try to print the mandala at 100% size. Some printers may automatically scale the image to fit the paper, which can cause the final print to be distorted.
  8. Make sure to use the right kind of paper for your printer. Some printer paper is not suitable for all types of printers, so check the specs or consult the printer manual and do a test first.

Hopefully this will have whet your appetite for coloring mandalas. Download a few of our mandala and start coloring and share your results with us (@makebreaks on Instagram).

FREE Gold Foil Background

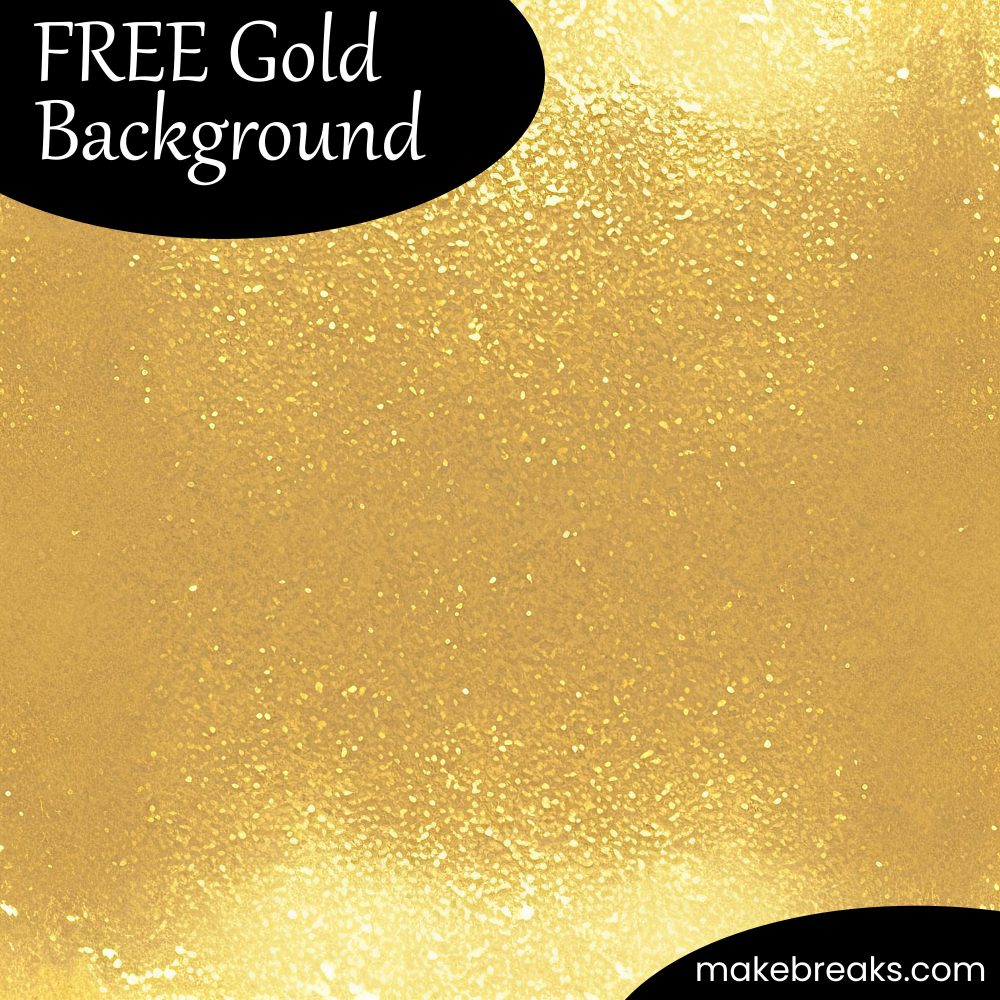
Free gold foil background to download 🙂 Are you looking for a beautiful and eye-catching background to add some shine to your projects? Look no further! Today, we’re excited to share with you a stunning free gold foil pattern background that’s sure to elevate your work to the next level. Whether you’re looking to spruce up your digital planning or scrapbooking or print out high-quality designs, this image has got you covered with its 300 dpi resolution. And if this one isn’t quite what you’re looking for, don’t worry – we’ve got hundreds of other options to choose from. So go ahead, download this gold foil goodness, and let the creativity flow!”

I used this gold foil pattern to create this mandala – see the tutorial HERE

This file has been saved at 300dpi and are 3000 pixels tall (therefore giving you excellent quality prints at letter / a4 size), or can be sized down for digital use.

This attractive watercolor images can also be used to create great looking wall art – add a few words in your favorite graphics app.

More Free Watercolor Patterns & Backgrounds

We have more watercolor backgrounds for you to use in your crafting projects here:

You are welcome to use these in digital scrapbooking and other digital projects, or print them and use them as you would any piece of decorative paper. Download the zip file below:

Download Gold Foil Pattern

Gold Background

Tutorial: Fill Mandalas Lines With Patterns

Welcome to this tutorial on digital crafting using mandalas! In this guide, we’ll explore an exciting technique of filling mandalas with patterns (clipping a pattern to the mandala shape) using popular apps and graphics software such as Procreate and Affinity Publisher/Designer. Whether you’re using a mobile device or a desktop, this tutorial will show you how to create unique and attractive results without coloring.

This non-traditional approach to mandalas is an excellent way to create eye-catching designs that can be used for making cards, decor and more. And the best part is, you can use our free mandala maker to create your own unique designs and our free backgrounds to complete your projects. So let’s get started!

Create Your Mandala

The first thing to do is to create your mandala 🙂 You can, of course, use any mandala to do this, however in order to use this technique, your mandala must have a transparent background. When you create a mandala with the free Makebreaks Mandala Maker, you will find that you can select a transparent background when downloading your finished mandala.

For a full breakdown of all the features in our free mandala maker, see how How To guide HERE.

Tip: You can change the thickness lines in our mandala maker. I created one with thick lines to use in this tutorial – but there are no rights or wrongs, experiment and see which works for you!

When using our mandala maker, change the thickness of the lines when you are drawing to get different effects.

Get Your Pattern

You can use any pattern to fill your mandala – this includes photos. We have a HUGE selection of free patterns you can choose from or use one of your own.

How to Fill the Mandala With a Pattern

This is super easy to do and can be done in most graphics apps and software. I’m going to show you how to do it in some of the main ones, if you use a different app, try to adapt the key principle or get in touch and let us know what software you would like to see us use in tutorials.

Affinity Photo / Designer for Desktop

Affinity Photo and Designer are straight forward to use and the way the layers panel makes this technique VERY easy!

Load your mandala into either application then go to File > Place to add your pattern on top.

Then drag the pattern in to the mandala layer. You will see that immediately, the pattern is clipped to the mandala shape.

I used exactly the same technique to create the mandala image below:

However, this time, instead of the pink pattern, I filled the mandala with a white square and added a red square as the bottom layer to make the mandala pop from the page.

Photopea

Photopea is an amazing free browser based application. It is VERY similar to Photoshop. This is how I fill a mandala with a pattern in Photopea. In short, I add the pattern to the top of the mandala layer and then clip the pattern to the mandala beneath.

Procreate

Again, it’s super simple to create this effect using Procreate. Upload your mandala then place the pattern you want on top (use the wrench icon at the top right to select ‘Insert a file’.

Then, ensure the pattern layer is active (inserted image), swipe the layer icon in the layer panel to the right to reveal the tool options and select ‘Clipping Mask’.

Use Affinity for iPad

Again the process is pretty simple and is similar to the desktop.

Load the mandala and then add the pattern layer on top. Then drag the pattern layer so it goes into the mandala layer (the layer will turn blue when this happens) and you will see the pattern is clipped to the mandala.

Tips for Great Looking Results

Here are some tips for things you can try to get great looking and different results:


Duplicate the layer and experiment with blending options

As you can see in the image below, I duplicated the pattern layer and then experimented with the layer effect. You can try this in any of the apps that use layers and it’s a great way to get different results.

Try bold color combinations

Try contrasting the background and pattern – or as I have done here, layer a bold effect such as gold over a black background. By the way, if you love this gold foil effect, you can download the file for free HERE!

I hope this has given you some different ideas for how to use our free mandala maker and inspired you to experiment – and have fun!

Free Cute Printable Valentine’s Graphics

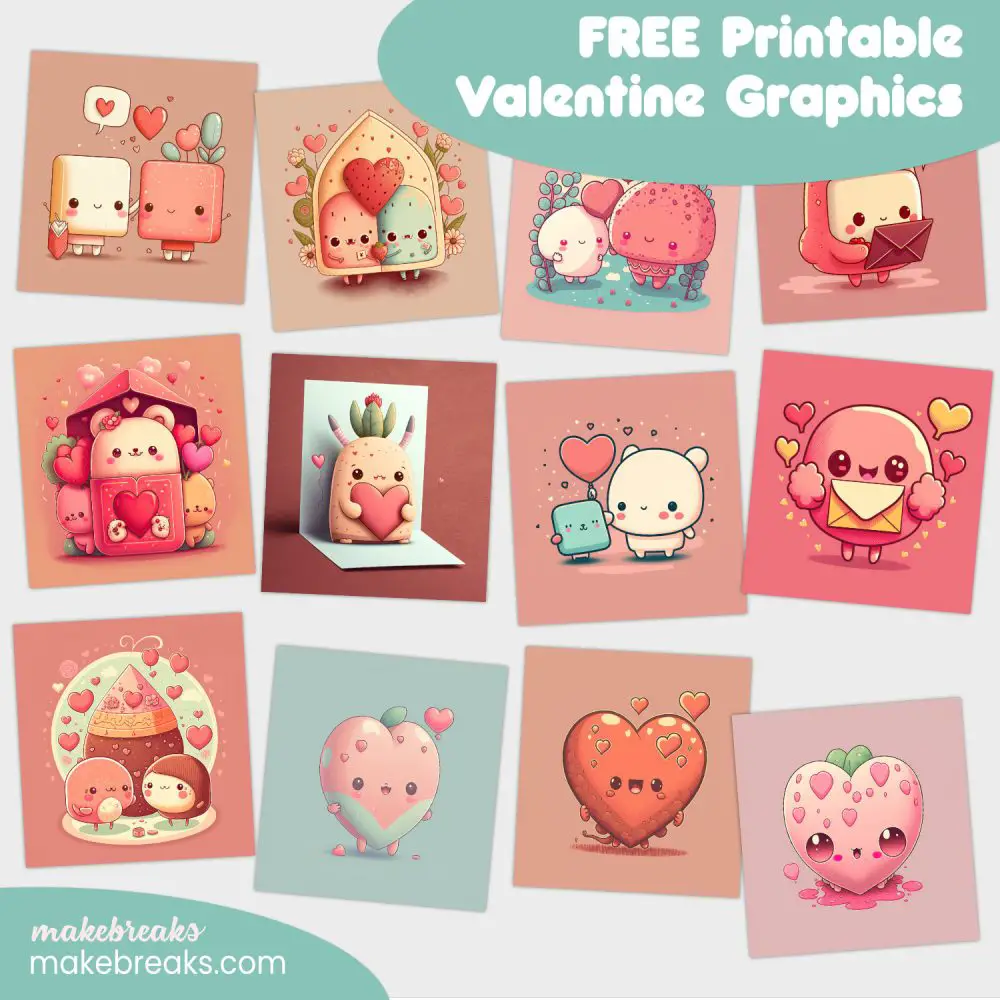
Free Printable Valentine’s Day Graphics: Adorable Creatures for Your Romantic Occasions

Valentine’s Day is just around the corner and what better way to celebrate love and affection than with some cute and colorful graphics. If you’re planning to make a special card or poster for your significant other, we have got you covered with our latest collection of free printable graphics.

Want ready-to-print cards? We have 5 x 7″ cards to print to download free HERE!

Our collection features 12 adorable creatures in a color palette that is perfect for Valentine’s Day. Each graphic is square in shape, making them ideal for a variety of projects such as cards, posters, and much more. With these graphics, you can create something truly special and unique to show your love.

Whether you’re looking to make a romantic card or decorate your home with some love-themed illustrations, these graphics are the perfect solution. They are part of our growing collection of free printable graphics and illustrations and can be easily downloaded and used for your projects.

So why wait? Download our free printable valentine’s day graphics today and let your imagination run wild. Whether you’re a professional designer or just looking for something to make for your loved one, these graphics are the perfect starting point. Get creative, have fun and spread some love this Valentine’s Day!”

Free Printable Valentine’s Graphic Formats

The graphics are saved as JPG files and are 2048px square. This will fit onto letter and a4 paper giving you great quality prints. I have also optimized the images so they can also be used in digital projects.

Click the download button under each preview to download the files to your computer.

More Heart Themed Printables HERE

Looking for more Valentine’s Day projects? Why not make a Valentine or romantic themed poster? We have a tutorial HERE which shows you how using free software!

Check out our blank heart templates here – free heart templates.

Don’t forget to sign up to our newsletter! Be the first to know of new freebies and other fun things! SIGN UP HERE 🙂

Father’s Day Ties to Color – Coloring Page for Kids

These three pages of ties to color are ideal for Father’s Day or dad’s birthday. These are designed to print on half a sheet of letter or a4 paper meaning that they will be great to make cards with. However, you can enlarge the print size to print on full size paper with no loss of quality.

Don’t forget to sign up to our NEW arts and crafts newsletter! Be the first to know of new freebies and other fun things! SIGN UP HERE 🙂

You can download the file here:

Coloring Ties

Free Cute Printable Valentine’s Cards

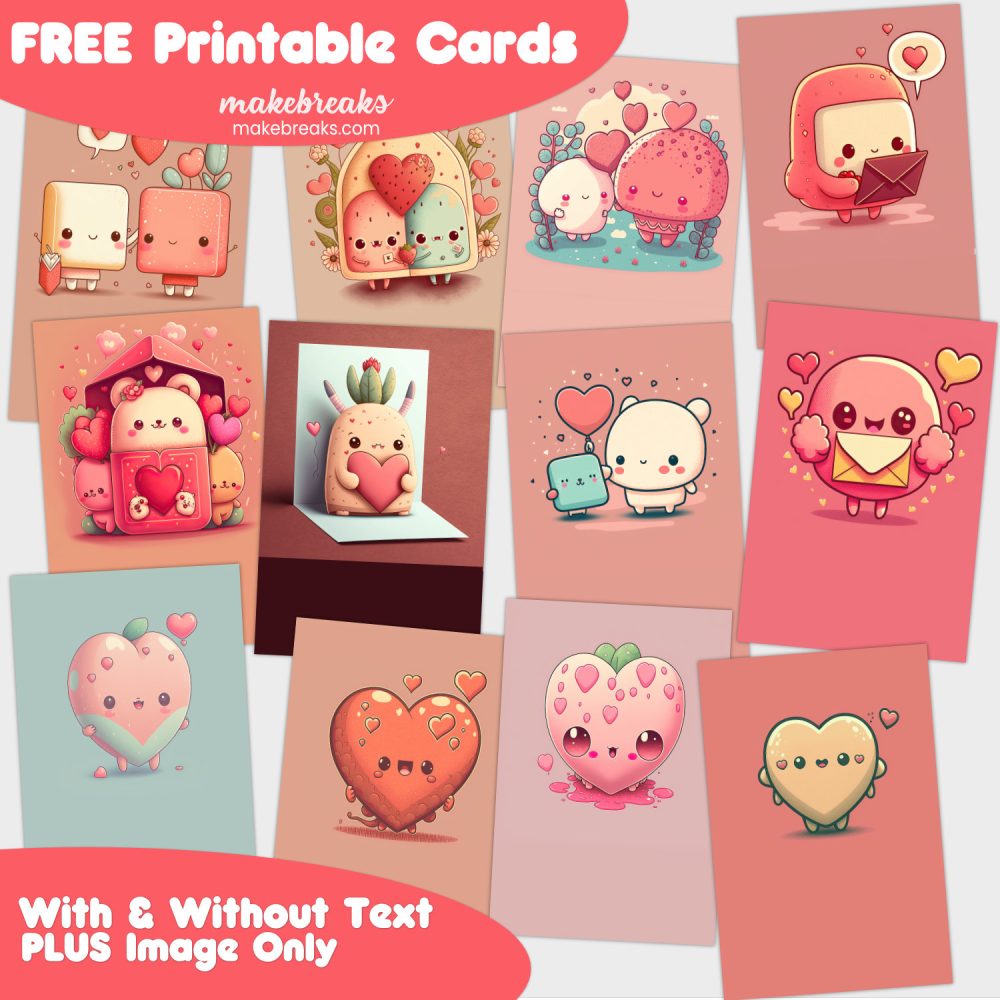
12 Free Valentine’s Day Cards to Print for a Heartwarming Celebration

Valentine’s Day is just around the corner and what better way to show your love and affection than with a handmade card. Whether you’re sending it to a significant other, a family member, or a friend, a handmade card is a personal touch that will show them how much they mean to you. To make things easier, we’ve created 12 new free Valentine’s Day cards that you can print and cut out at home.

Want just the graphic? We have a large version of the graphic we’ve used to make the cards HERE!

Each design features adorable characters and comes in a variety of color schemes, perfect for creating a romantic mood. Each card comes in three formats: one with the text “I Love You” already included, one with no text for you to add your own message, and one design-only format, giving you complete creative control. All of the cards are 5 x 7 inches, and can be printed on letter or A4 paper.

Each card has been carefully designed to bring a smile to your loved one’s face. To make it even easier to use, we’ve also included a card template, so you can cut out the perfect size and shape every time.

Ready to print card templates are included with and without text PLUS the graphic on its own 🙂

Tips for Printing the Perfect Valentine’s Day Cards

  1. Use high-quality paper or cardstock: To ensure your cards look professional and hold up over time, use a heavy weight paper or cardstock when printing. This will give your cards a sturdy feel and help prevent them from bending or creasing.
  2. Score the fold: Before folding your card in half, use a bone folder or the back of a spoon to score the fold line. This will help ensure a crisp, clean fold that will make your cards look polished and professional.
  3. Customize with glitter: To add a touch of sparkle to your cards, consider adding dabs of glitter glue or glitter pens to the design. This is a fun and easy way to make your cards stand out and add a bit of glamour.
  4. Add stickers and other elements: To further personalize your cards, consider adding stickers, ribbon, or other decorative elements. This is a great way to make your cards unique and special to the recipient.
  5. Write a personal message: No Valentine’s Day card would be complete without a special message. Take the time to write a message that is unique and personal to your loved one. Whether it’s a simple “I Love You” or a heartfelt poem, your message will be the most important part of the card.

By following these tips, you can create beautiful and professional-looking Valentine’s Day cards that will make your loved ones feel special and appreciated. Happy printing!

Free Printable Valentine’s Day Card Formats

For your convenience you will find JPG files in each of the three formats in the download file (with and without ‘I Love You’ text contained in a template for easy cutting/folding and the graphic on it’s own in 5×7″ file if you want to create your own or make a postcard rather than a card.

Click the download button under each heart to download the files to your computer.

Download All Cards in One File

If you want to download all the hearts in one file, click the download button below. However, do note this is a large file and will take time to download 🙂

All 12 Cards

More Heart Themed Printables HERE

Looking for more Valentine’s Day projects? Why not make a Valentine or romantic themed poster? We have a tutorial HERE which shows you how using free software!

Check out our blank heart templates here – free heart templates.

Don’t forget to sign up to our newsletter! Be the first to know of new freebies and other fun things! SIGN UP HERE 🙂

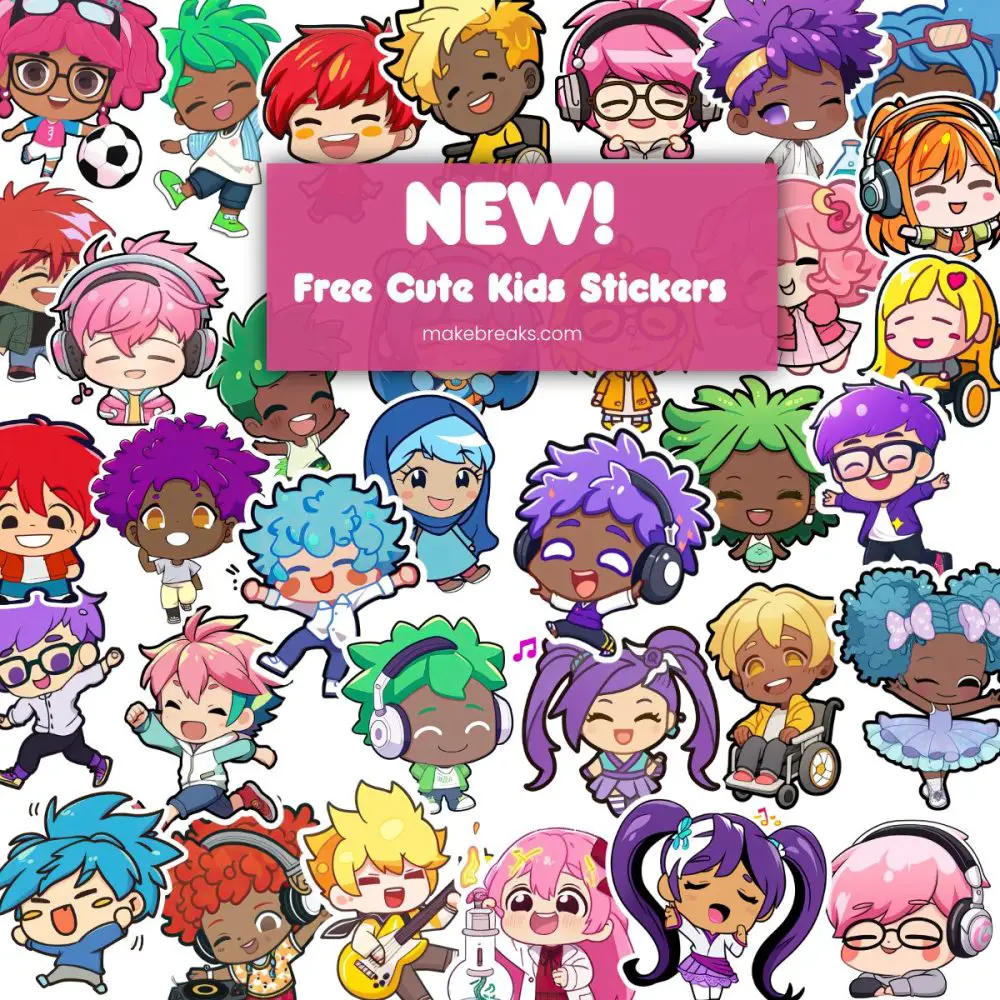
Cute Kids and Animals – Stickers/Clipart to Print or Use in Digital Projects

Introducing a New Range of Adorable Kids and Animals Graphics!

Are you looking for cute and fun graphics to add to your planner, scrapbook, or other projects? Look no further! A new range of kids and animals graphics has arrived, and they are perfect for all your needs.

Find the GROWING range of free stickers HERE!

These graphics feature kids engaged in different activities and a whole bunch of adorable animals. The images are of high quality, saved at 300dpi and 1200px in size, making them ideal for printing and adding to physical projects. But don’t worry, they’ve also been optimized for digital use, so they are perfect for your digital planners, digital scrapbooks, and other digital projects.

Whether you’re a professional planner, a scrapbooking enthusiast, or just someone looking to add a little bit of fun to your life, these graphics are the perfect addition. And the best part? They’re completely free!

The range of graphics is constantly growing, with new additions being made on a weekly basis. So, bookmark the page and check back often to see what’s new.

We would love for you to share these graphics with others and spread the word about this exciting new resource. Share on social media, tell your friends and family, and let everyone know about this fantastic new range of kids and animals graphics.

Cute Girl Graphic

Tips for Using Free Cute Kids and Animals Graphics from Makebreaks 🙂

Here are some tips for using these adorable kids and animals graphics:

  1. Downloading and Opening a Zip File: To download the graphics, simply click the download link and save the zip file to your computer. To open the zip file, right-click on the file and select “Extract All.” This will extract the individual graphics files from the zip file.
  2. Saving the Images: To make sure you can find the images again, save them to a location that is easy to access and remember, such as your desktop or a specific folder you created.
  3. Using Transparent Backgrounds: One of the best features of these graphics is the transparent background, which makes it easy to layer the images over other graphics. This means you can use these cute kids and animals graphics to enhance your projects and make them even more special. When you open the graphics in an image editing program, you’ll see the transparent background around the image, making it easy to place the graphic on top of another image or background.
  4. Adding to Physical Projects: To add these graphics to physical projects, simply print them out and use scissors or a craft cutter to cut them out. Then, use double-sided tape or adhesive to attach them to your project.
  5. Adding to Digital Projects: To use the graphics in digital projects, simply import the image into your digital editing program, such as Canva or Adobe Photoshop. Then, use the layering tools to place the image on top of your background or other graphics.

With these tips, you’ll be able to use these cute kids and animals graphics to add some fun and personality to all your projects. So, what are you waiting for? Start downloading and adding some cuteness to your life today! Have fun!

No post found

FREE Valentine Cute Critter Weekly Coloring Page – Week 5

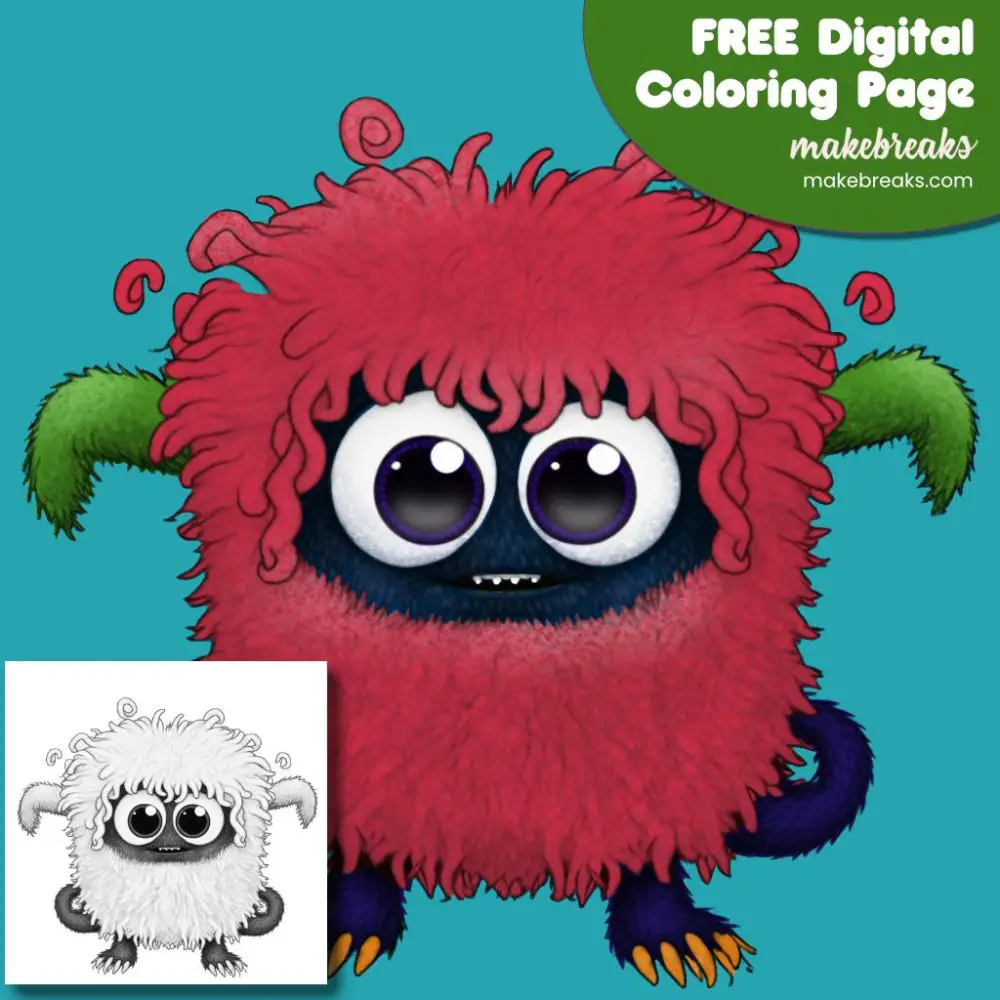
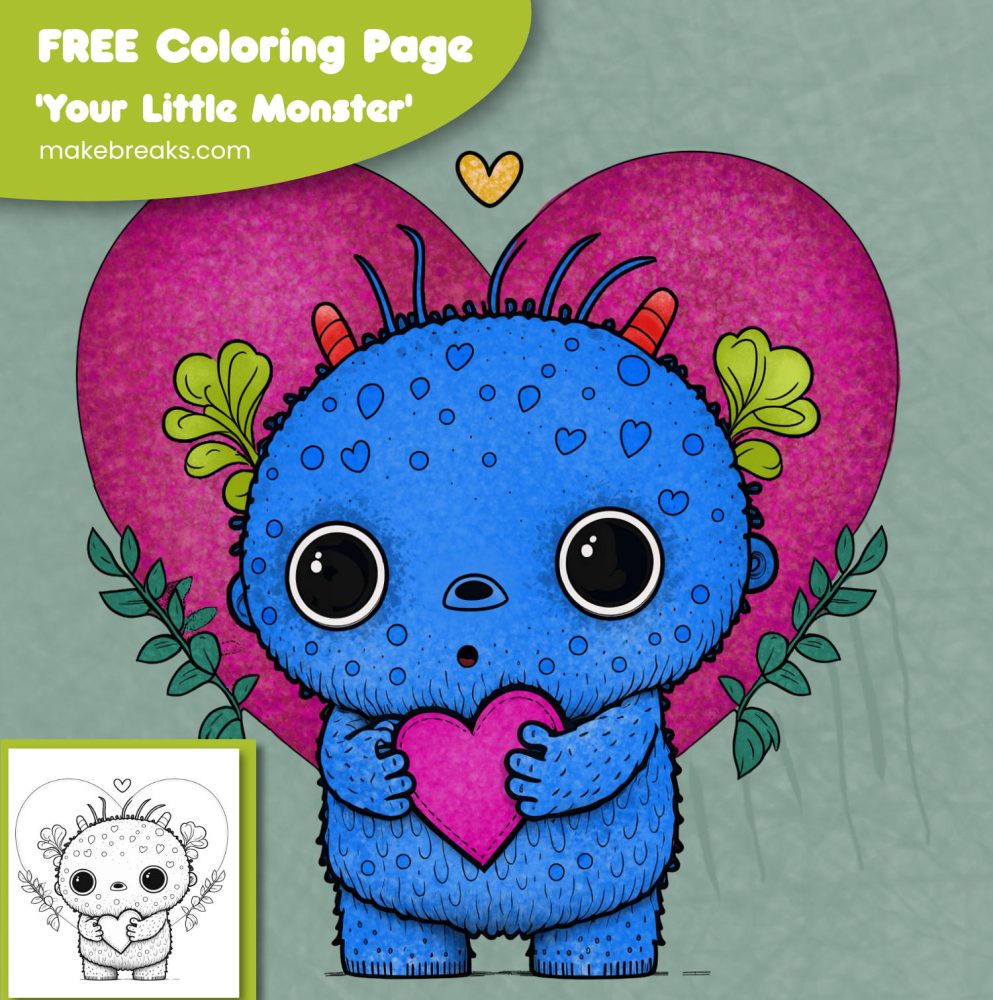
Welcome to this week’s free coloring page. This week we have a Valentine’s Day coloring extravaganza! We’re thrilled to share with you a charming and delightful coloring page of an adorable cute critter holding a big heart. This page is perfect for all your Valentine’s day projects like cards, posters, and gifts. The file is in PNG format with a transparent background, which makes it perfect for printing and coloring, or coloring in an app like Procreate. With a size of 3000px square, your finished artwork will be of great quality and detail.

Whether you prefer traditional media or digital coloring, we’ve got you covered with some coloring tips. For traditional coloring, you can use colored pencils, markers, or watercolors. For a bold look, use bright and vibrant colors, or for a softer look, opt for pastel hues. To make your monster stand out, try adding shading and texture to give it dimension.

For digital coloring in Procreate, the possibilities are endless! Experiment with different brushes and layers to achieve your desired look. You can also add some fun elements like glitter and sparkles for an extra pop of excitement.

We can’t wait to see your finished pages! Be sure to share your masterpieces with us on social media – @makebreaks. We’d love to see the creativity and love you put into each one. Happy coloring!

If you are not familiar with digital coloring pages – these are pages I have designed specially for use in apps such as Procreate and Affinity Designer/Photo as well as desktop apps such as Photoshop. Plus they can be used in free graphics apps like Medibang, Ibis Paint and the fantastic Photopea which is a free application you can use in your browser (nothing to download!).

GET STARTED WITH DIGITAL COLORING PAGES

In short, a digital coloring page is a file I have created with a transparent background. There is no opaque white on the page as you would find in a traditional coloring page. This means you can use it in a package like Procreate and use layers to color UNDER the design. Many of these pages have transparent shading so they are super-easy to use and to get great results! I have more information about digital coloring pages HERE.

High Resolution Files

However, unlike many other digital products which are created with lower resolution for digital use, I have created these as high resolution files at 3000 x 3000 px, which means you will get high quality prints even at larger sizes (print 10″ x 10″ at 300dpi or 20″ x 20″ at 150dpi).


Find more free digital coloring pages HERE


I would LOVE IT if you tag me on Instagram or your favourite social media site if you use these pages  #makebreaks #digitalcoloring 😀

If you would like me to share your finished artwork on the site or social media, you are very welcome to send me a finished copy of your project (you are welcome to watermark it). Send it to kate@makebreaks.com with any info about how you would like me to credit your work and website or social media links.

Want to know when new free coloring pages are added? Be the first to know of new freebies and other fun things! SIGN UP HERE 🙂

Download Free Cute Critter Digital Coloring Page

Valentine Cute Critter Coloring Page

Find more free coloring pages HERE
Free Printable Cute Groundhog Graphic

This cute free groundhog day graphic is perfect for groundhog day projects on February 2nd. There are two versions of this graphic, one without any text, so you can add your own and the other with ‘happy groundhog day’ ready to print.

Free Printable Groundhog Illustration Graphic Size

The files are 1500 pixel wide. The files are saved in PNG formats to give you the best possible quality to work with.

✨✨✨More Free Printable Graphics and Illustrations HERE✨✨✨

If you want to use this graphic to create a poster. we have a tutorial HERE which shows you how using free software or add it to a our free greeting card template to create a quick handmade card.

Don’t forget to sign up to our newsletter! Be the first to know of new freebies and other fun things! SIGN UP HERE 🙂

Download Free Groundhog Graphic :

Happy Groundhog Day

More Animal Freebies

We have lots more animal themed printables for you – check them out HERE!

Sentiments for Valentine’s Day Cards

Finding the right words for your handmade Valentine’s Day cards can be tricky – particularly as nowadays Valentine’s Day cards can be given as a mark of friendship and appreciation as well as a romantic gesture. Well, if you’ve created the perfect Valentine’s Day card (if you haven’t, check out our free Valentine’s Day printables to get you started) and you’ve got stuck after ‘roses are red’, help is at hand! Take a look below and you will never need to think of a sentiment for Valentine’s Day card again 🥰🥰🥰

Why Make Handmade Valentine’s Day Cards

Before we start, why make handmade Valentine’s Day cards? Handmade Valentine’s Day cards are often considered to be better than store-bought cards for a few reasons.

Firstly, a handmade card is a more personal and thoughtful gesture. It shows that you took the time to create something special for the person you care about, rather than just picking up a generic card at the store.

Secondly, handmade cards are often unique and one-of-a-kind. They are not mass-produced, and you can add your own personal touch or special message to make it more meaningful and you will find LOADS of fun Valentine’s Day sentiment ideas below!

Thirdly, Handmade cards often contain sentimental value and can be kept as a keepsake for a long time, particularly when you have chosen a thoughtful phrase or two to add to the card.

Lastly, by making a card, you can be more creative and playful in expressing your feelings, which can make the card more enjoyable to the person receiving it.

Overall, a handmade Valentine’s Day card is a great way to show someone how much you care, and it’s a thoughtful and unique way to express your love.

The sentiments below will help you make your handmade Valentine’s Day card that little bit extra special 🙂

Sentiments for Valentine’s Day Cards

Check our the following lists, you will see they are broken down by theme. If we’ve missed any, let us know!

Traditional Valentine’s Day Sentiments

  • You’re the missing piece to my puzzle.
  • I’m endlessly falling in love with you.
  • You light up my world like nobody else.
  • I can’t imagine a day without you by my side.
  • You make my heart skip a beat.
  • I’m so grateful to have you in my life.
  • You’re my everything.
  • My love for you grows stronger with each passing day.
  • I’m so lucky to call you mine.

Roses Are Red… Funny Sentiments

Want to make a cute card? This free printable template has the words ‘roses are red, violets are blue…’ ready for you to add your own ending. Pick one of the ones below or create your own 🙂

  • Roses are red, violets are blue, I’m not a poet, but I think you’re swell.
  • Roses are red, violets are blue, sugar is sweet, but not as sweet as you.
  • Roses are red, violets are blue, I’ve got a crush, but it’s not as big as my shoe.
  • Roses are red, violets are blue, I’m no chef, but I can make a mean Quesadilla for two.
  • Roses are red, violets are blue, I’m no poet, but I love you.
  • Roses are red, bacon is too, I love you more than bacon, that’s not new
  • Roses are red, violets are blue, I’m allergic to flowers, but I’ll still buy some for you.
  • Roses are red, violets are blue, I’m no poet, but I’ll try to woo.
  • Roses are red, violets are blue, I got a gym membership, now my body is ready for you.
  • Roses are red, violets are blue, I’m not great at math, but you plus me equals love that’s true.
  • Roses are red, violets are blue, I know this poem is cheesy, but so is fondue.

I Love You More Than…

This needs no explanation! What bigger complement can you give someone than the fact you love them more than <insert your favorite thing here 😉 >

Funny Valentine’s Day Sentiments

  • “Happy Valentine’s Day to the person who makes my life feel like a romantic comedy… minus the romance.”
  • “Happy Valentine’s Day to the person who completes me… in a non-creepy way.”
  • “Happy Valentine’s Day to the person who makes my heart skip a beat… and not in a good way.”
  • “Happy Valentine’s Day to the person who makes my life feel like a Hallmark movie… but with more sarcasm.”
  • “Happy Valentine’s Day to the person who makes my heart race… when they’re late coming home.”
  • “Happy Valentine’s Day to the person who makes my life feel like a fairytale… with more arguments and less magic.”
  • “Happy Valentine’s Day to the person who makes my life feel like a romantic comedy… with more toilet humor.”
  • “Happy Valentine’s Day to the person who makes my heart melt… like a popsicle on the sidewalk in July.”
  • “Happy Valentine’s Day to the person who makes my life feel like a love song… with more off-key singing.”

Sweet Sentiments for Valentine’s Day Cards

  • “Happy Valentine’s Day to the love of my life, my best friend and my soulmate.”
  • “I am so grateful to have you in my life, Happy Valentine’s Day.”
  • “You are my everything and I am so lucky to have you in my life, Happy Valentine’s Day.”
  • “Happy Valentine’s Day to the most wonderful person I have ever met.”
  • “I cannot imagine my life without you, Happy Valentine’s Day.”
  • “You make my life complete and I love you more each day. Happy Valentine’s Day.”
  • “Happy Valentine’s Day to the person who makes my heart skip a beat every time I see them.”
  • “I am endlessly grateful for your love and support. Happy Valentine’s Day.”
  • “You are my sunshine on a cloudy day, my rock in troubled times, my everything. Happy Valentine’s Day.”
  • “Happy Valentine’s Day to my partner, my confidant, and my love.”

Sarcastic Sentiments for Valentine’s Day Cards

  • “Happy Valentine’s Day to the person who tolerates my existence.”
  • “Happy Valentine’s Day to the person who puts up with my nonsense all year long.”
  • “Happy Valentine’s Day to the person who makes my life bearable.”
  • “Happy Valentine’s Day to the person who has put up with my crap for another year.”
  • “Happy Valentine’s Day to the person who makes my life less terrible.”
  • “Happy Valentine’s Day to the person who makes my heart sing… or is that just indigestion?”
  • “Happy Valentine’s Day to the person who makes my life worth living… most of the time.”
  • “Happy Valentine’s Day to the person who makes my heart race… usually out of annoyance.”
  • “Happy Valentine’s Day to the person who makes my life feel like a romantic comedy… with more toilet humor.”
  • “Happy Valentine’s Day to the person who makes my heart melt… like a popsicle on the sidewalk in July.”

Sentiments for Valentine’s Day Cards for School Kids

  • “Happy Valentine’s Day to my best friend in class.”
  • “You are a great friend and I’m glad we’re in the same class. Happy Valentine’s Day.”
  • “Thanks for always being there for me, Happy Valentine’s Day.”
  • “I’m lucky to have a friend like you. Happy Valentine’s Day.”
  • “You make school more fun. Happy Valentine’s Day.”
  • “Thanks for being a great friend, Happy Valentine’s Day.”
  • “I enjoy spending time with you at school. Happy Valentine’s Day.”
  • “It’s great having you in my class. Happy Valentine’s Day.”
  • “You are a great friend to have in school. Happy Valentine’s Day.”
  • “Happy Valentine’s Day to a friend who always makes me laugh in class.”

Sentiments for Valentine’s Day Cards for Friends

  • “Happy Valentine’s Day to my best friend, my confidant, and my partner in crime.”
  • “Thank you for always being there for me and for being the best friend anyone could ask for. Happy Valentine’s Day.”
  • “I am so grateful to have a friend like you in my life. Happy Valentine’s Day.”
  • “I value your friendship more than you know. Happy Valentine’s Day.”
  • “You make my life better just by being in it. Happy Valentine’s Day.”
  • “I am so lucky to have you as my friend. Happy Valentine’s Day.”
  • “Happy Valentine’s Day to a friend who I can always count on.”
  • “You are not only my friend, but also my family. Happy Valentine’s Day.”
  • “I treasure our friendship more than words can say. Happy Valentine’s Day.”
  • “Happy Valentine’s Day to a friend who makes life more fun and less lonely.”

Sentiments for Valentine’s Day Cards for Grandparents

  • “Happy Valentine’s Day to the grandparent who has always been there with love and support.”
  • “You are the best grandparent anyone could ask for. Happy Valentine’s Day.”
  • “I am so lucky to have you in my life. Happy Valentine’s Day.”
  • “I love spending time with you and hearing your stories. Happy Valentine’s Day.”
  • “Thank you for always being there to listen and offer advice. Happy Valentine’s Day.”
  • “I am grateful for your love and guidance. Happy Valentine’s Day.”
  • “You make my life better just by being in it. Happy Valentine’s Day.”
  • “I value your love and wisdom. Happy Valentine’s Day.”
  • “You have always been an important part of my life. Happy Valentine’s Day.”
  • “I am so glad you are my grandparent. Happy Valentine’s Day.”

Sentiments for Valentine’s Day Cards for Neighbors

  • “Happy Valentine’s Day to my favorite neighbor.”
  • “Thank you for being a good neighbor. Happy Valentine’s Day.”
  • “I appreciate your friendship and support. Happy Valentine’s Day.”
  • “You make our neighborhood a better place. Happy Valentine’s Day.”
  • “I am grateful for your kindness and helpfulness. Happy Valentine’s Day.”
  • “I feel lucky to have you as my neighbor. Happy Valentine’s Day.”
  • “You always brighten my day with your smile. Happy Valentine’s Day.”
  • “I am so grateful for your willingness to lend a hand. Happy Valentine’s Day.”
  • “You are a good neighbor and a great friend. Happy Valentine’s Day.”
  • “Happy Valentine’s Day to a neighbor who makes living here even better”

Sentiments for Valentine’s Day Cards for Teachers

  • “Thank you for always being patient with us and helping us learn.”
  • “You make learning fun and exciting.”
  • “I appreciate all the extra time and effort you put into helping us succeed.”
  • “Thank you for always believing in us.”
  • “I am so grateful to have you as my teacher.”
  • “Your encouragement and guidance have helped me to grow so much.”
  • “I am so lucky to have you as my teacher.”
  • “Thank you for making a difference in my education and my life.”
  • “You inspire me to do my best and to never give up.”
  • “I appreciate your dedication and hard work as my teacher.”

How to Say ‘Happy Valentine’s Day in Different Languages

Here are a few translations for “Happy Valentine’s Day” in some of the world’s major languages:

  • English: Happy Valentine’s Day
  • Spanish: Feliz día de San Valentín
  • French: Joyeuse Saint-Valentin
  • German: Fröhlichen Valentinstag
  • Italian: Buon San Valentino
  • Portuguese: Feliz dia de São Valentim
  • Chinese (Mandarin): 情人节快乐 (Qíngrén jié kuàilè)
  • Arabic: عيد الحب السعيد (Īdu-l-ḥubb-i-saīd)
  • Russian: С Днём Святого Валентина (S Dnyom Svyatogo Valentina)
  • Japanese: バレンタインデーおめでとう (Barentain dē omēdētō)
  • Hindi: हैप्पी वैलेंटाइन डे (Happi vailentain de)
  • Indonesian: Selamat Hari Valentine (Happy Valentine’s Day)

Note that some languages have multiple ways to say it depending on region and dialect.

How to Say I Love You in Different Languages

Here are a few translations for “I love you” in the languages we used above:

  • English: I love you
  • Spanish: Te quiero
  • French: Je t’aime
  • German: Ich liebe Dich
  • Italian: Ti amo
  • Portuguese: Eu te amo
  • Chinese (Mandarin): 我爱你 (Wǒ ài nǐ)
  • Arabic: أحبك (Uhibbuka)
  • Russian: Я люблю тебя (Ya lyublyu tebya)
  • Japanese: 私はあなたを愛しています (Watashi wa anata o aishiteimasu)
  • Hindi: मैं तुमसे प्यार करता हूँ (Main tumse pyar karta hoon)
  • Indonesian: Saya cinta kamu (I love you)

As we mentioned above, please note that some languages have multiple ways to say it depending on region and dialect.

Free Printable Sentiments

If you are looking for sentiments you can simply print and add to your own cards and projects, check out the pages below. Tip: To make printed sentiments look part of the design and not stuck on as an afterthought, try cutting the sentiment from paper using fancy pattern edge scissors and print onto a paper which has a color to match your project.

No post found

There are just a few sentiments and greetings ideas for Valentine’s Day to get you started! Do let us know if you have any suggestions or requests for sentiments for other occasions 🙂